Create rental order

You can easily create new rental order via the Create order -interface to start immediately or schedule it for later

Written by
Karri Hiekkanen
Published on
Dec 20, 2024
Updated on
Dec 20, 2024

Serving walk-in or call-in customers is quick and straightforward. With a few simple steps, you can easily create an order, whether it's for immediate rental or a future reservation.

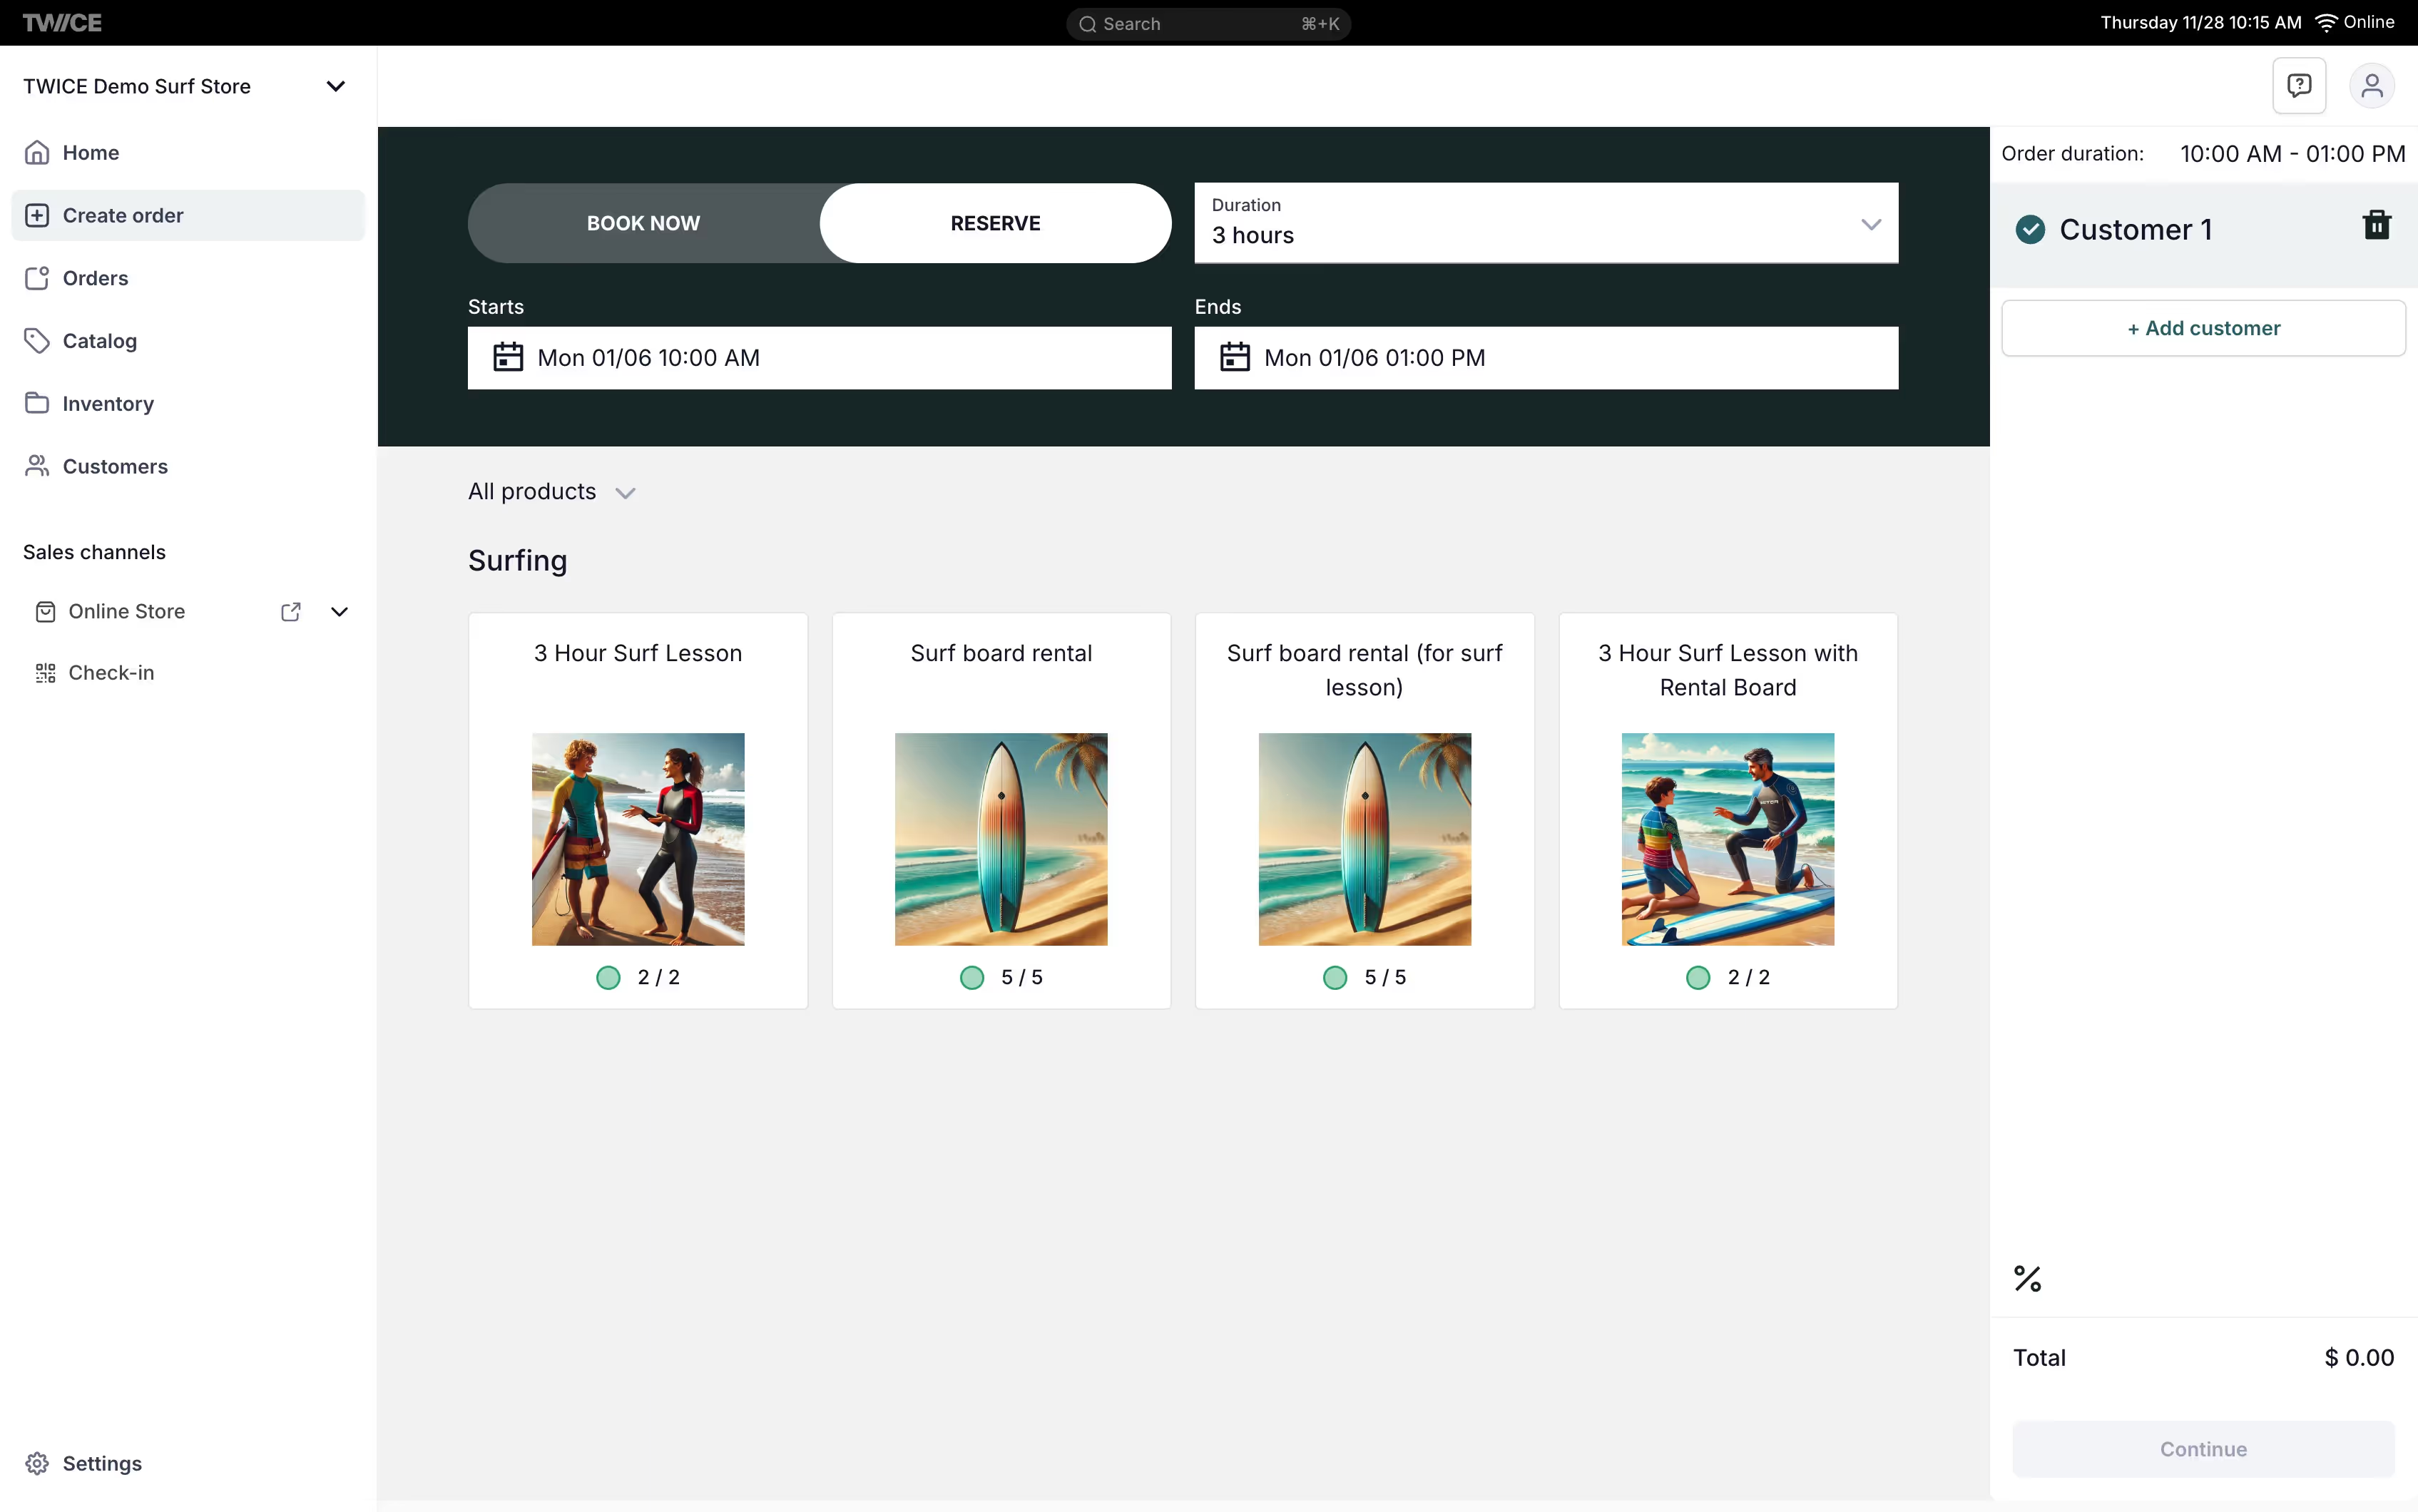
All manual orders are created in the Create order tab from the main dashboard.
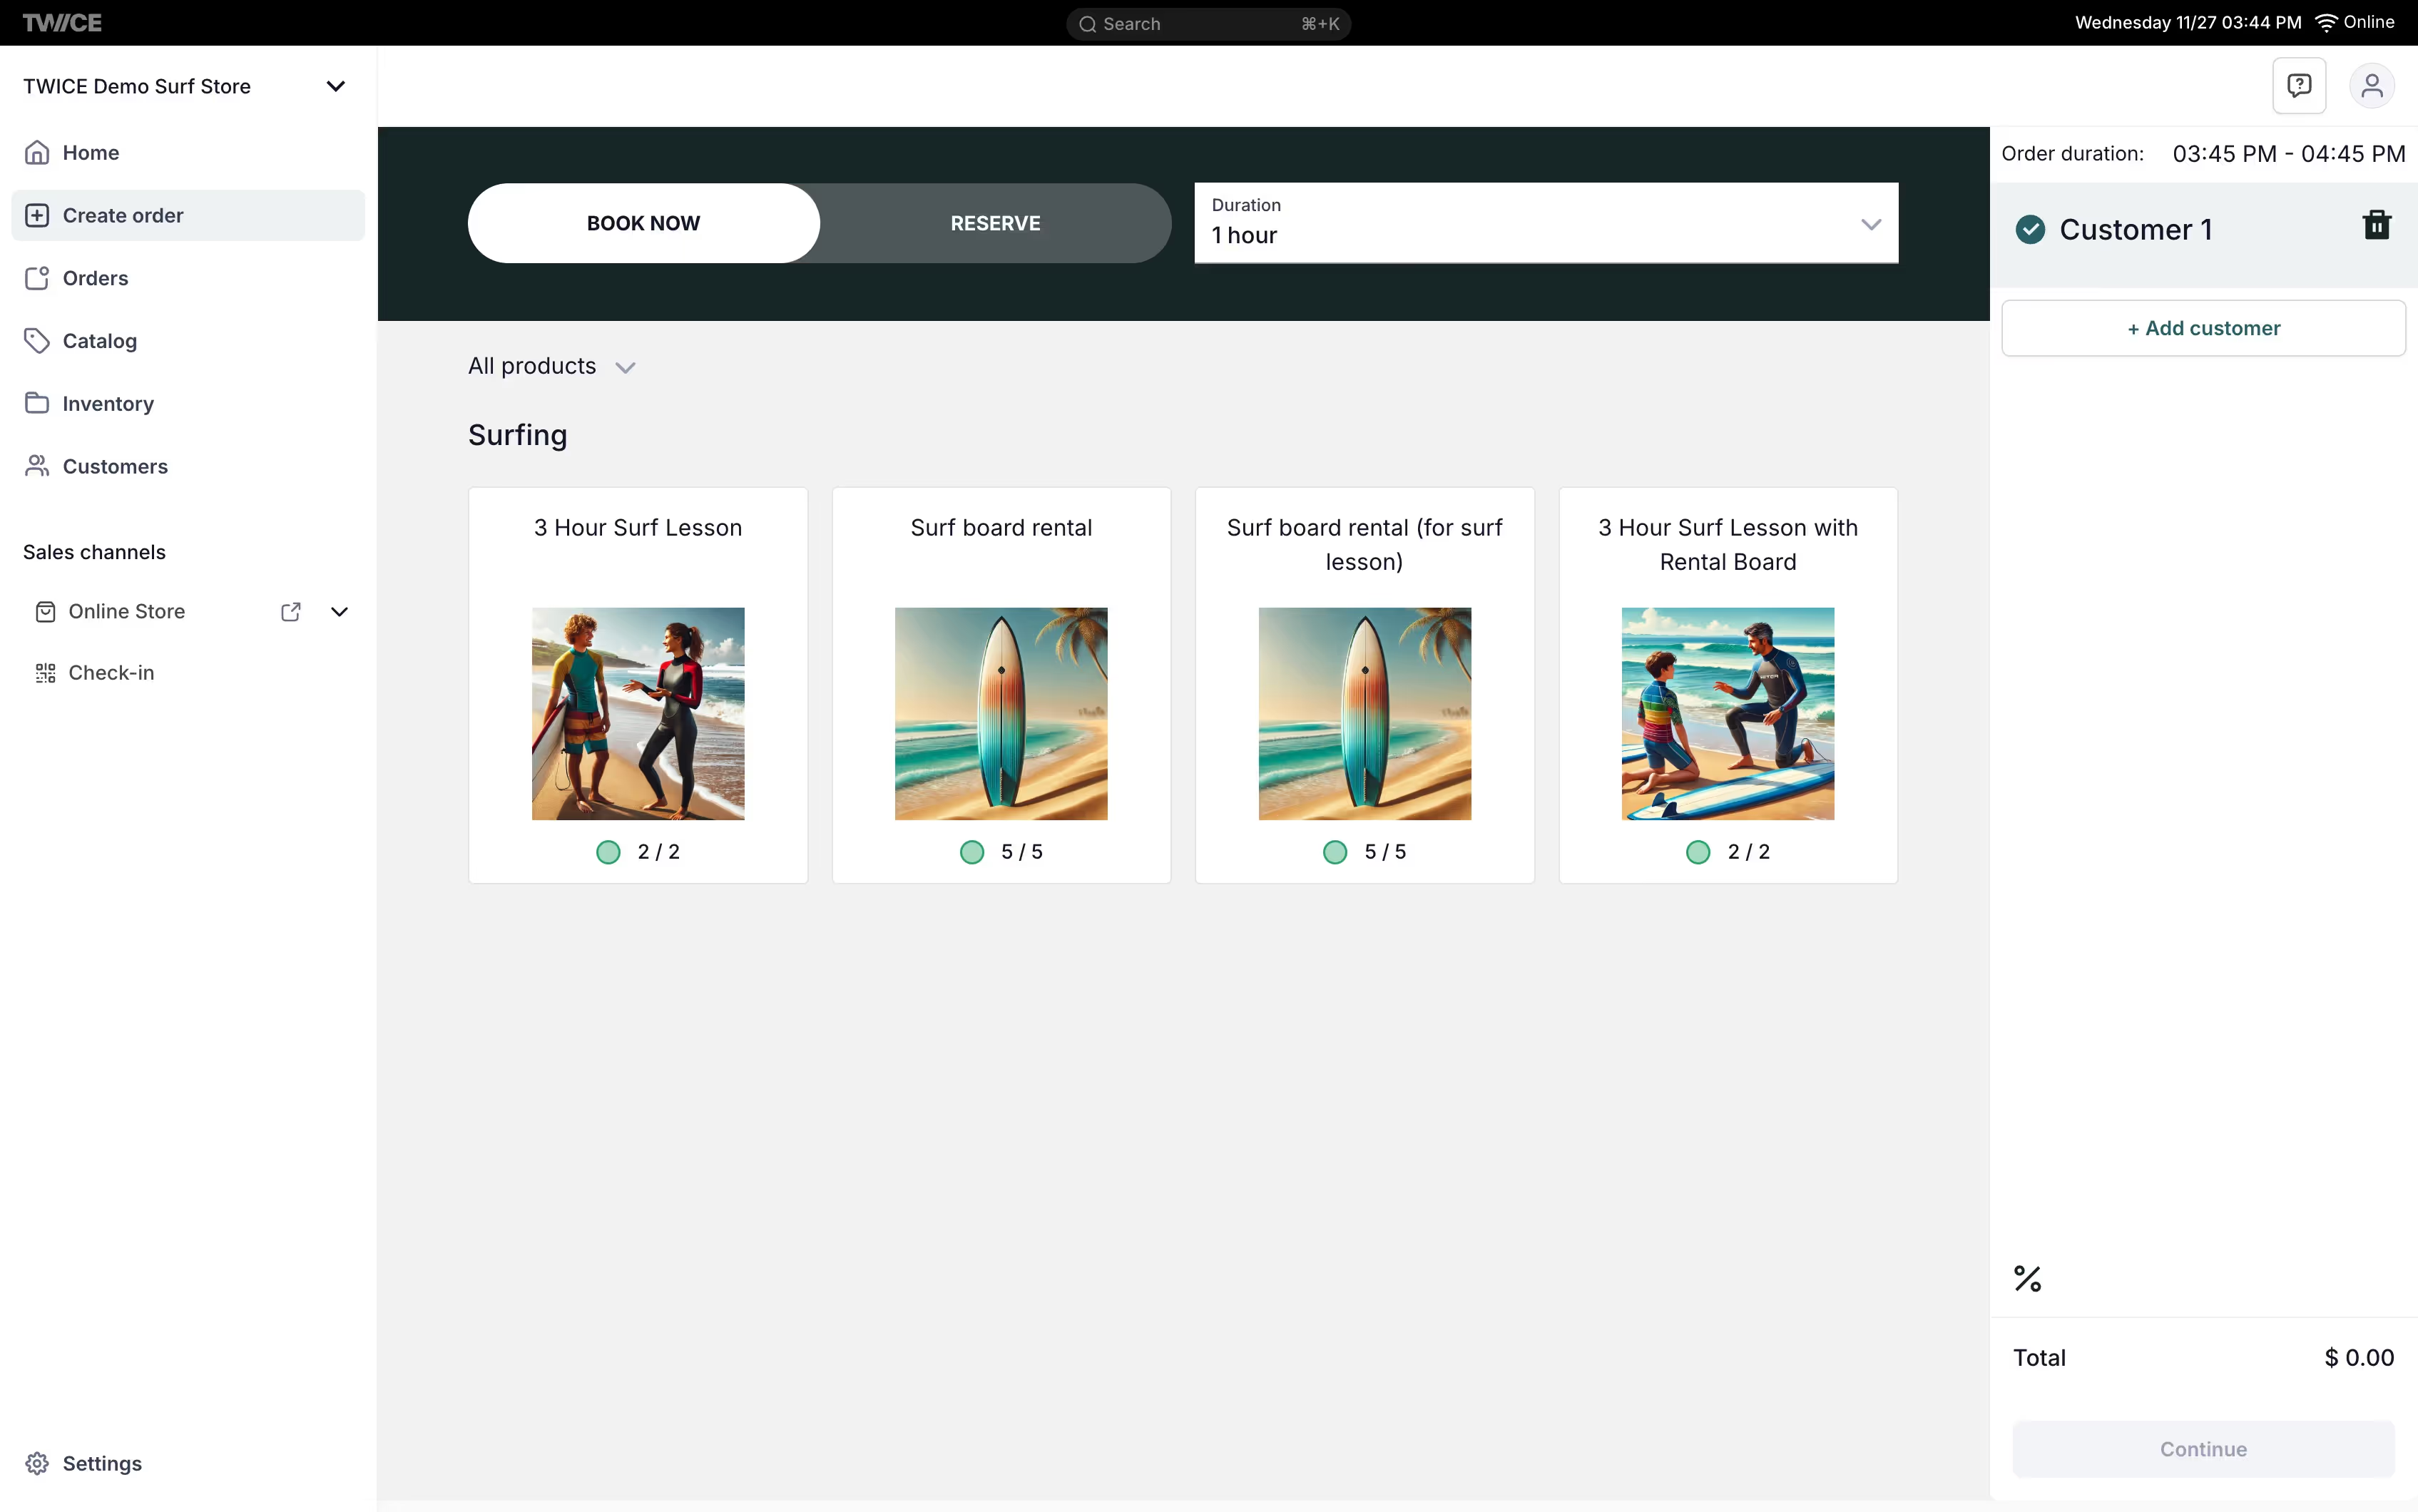
1. Choose order type

  • In the Create order screen, choose between:
    • Book: Start the rental immediately (ideal for walk-in customers).
    • Reserve for later: Set specific start and end times for the rental.
      • Fill in the required date and time fields.

2. Select rental duration

  • In the Rental Duration section, select the rental duration from the dropdown menu.
    • The duration options are based on the available product catalog.
    • If using standardized pricing tables, durations will be shared across different products.

3. Add additional customers (if needed)

By default the order has one customer (called Customer 1 for now). The customer details are filled on the next page. This enables full focus on defining the rental time, duration and products.

  • Navigate to the Add Customers section.
  • Click the Add Customer button to add more customers.

This is useful feature if for example you want to define who is responsible for which products. This works great with the printable order confirmation, especially if it is used as a rental waiver.

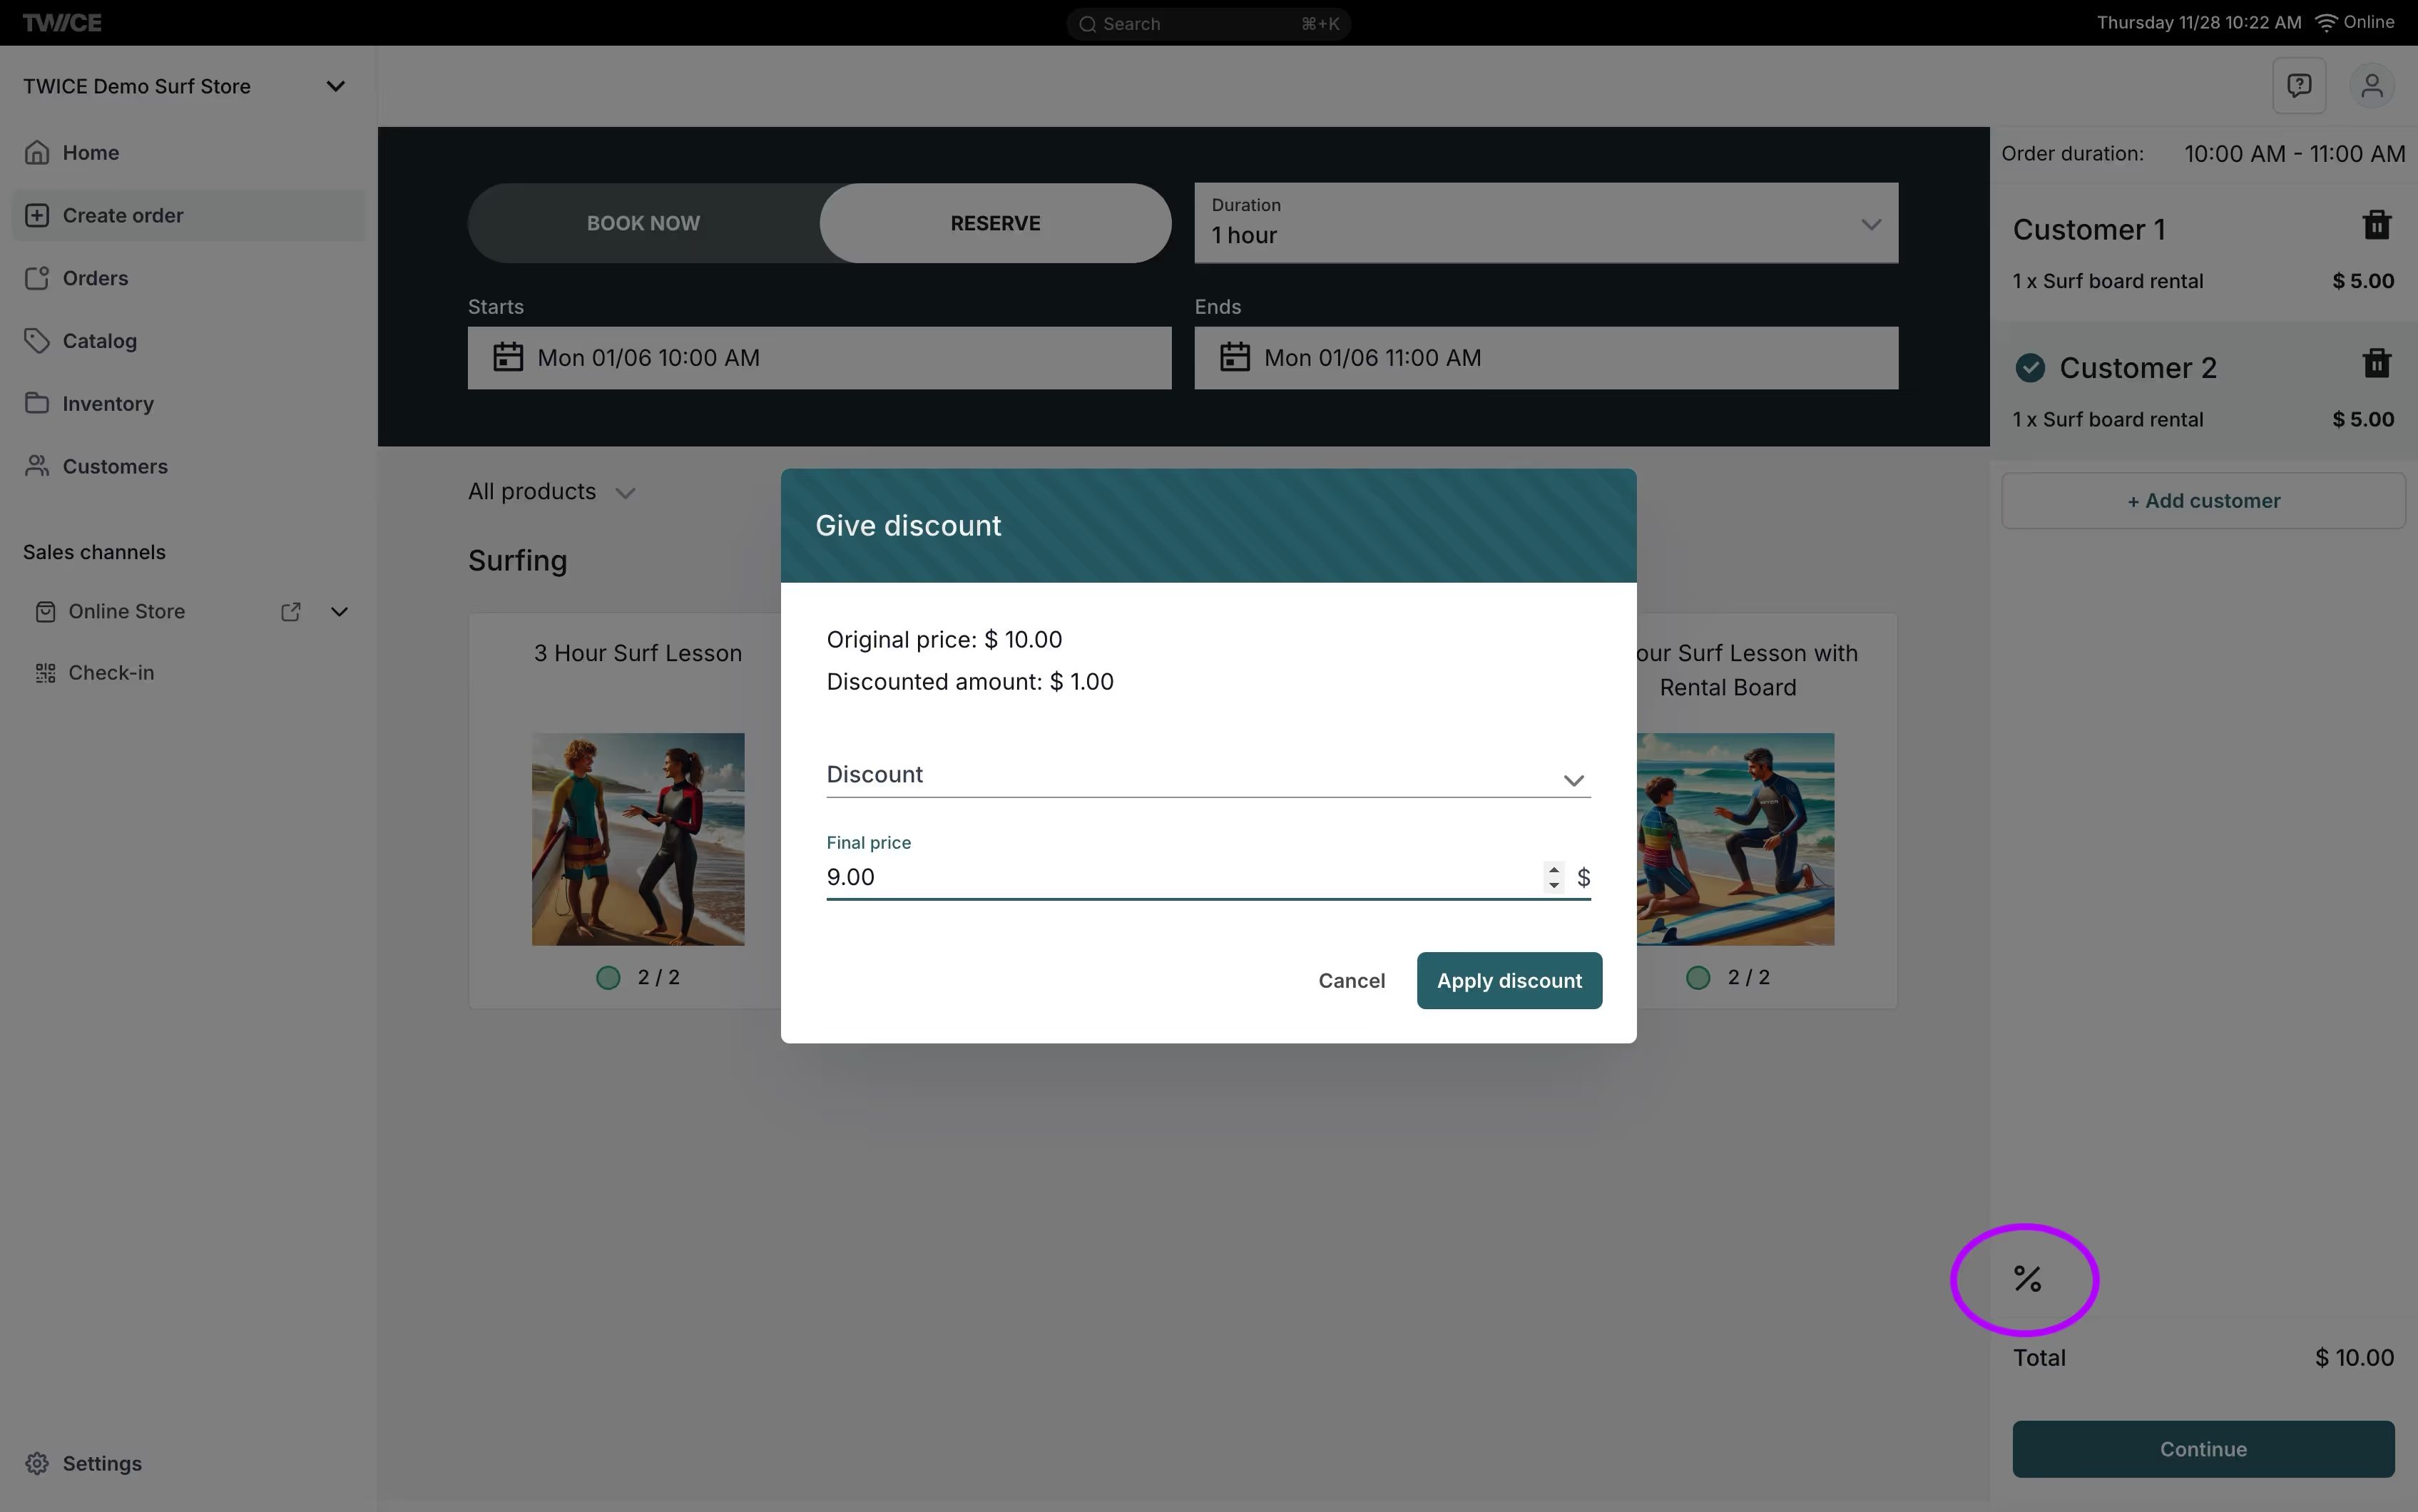
4. Add products to the order

  • You can see all available products from your catalog.
    • You can filter by category.
    • If you have multiple customers added, first select the customer you want to add the products for.
    • You can see the real-time availability for each product if the inventory items are tracked invidivually or the number of available items are set.

5. Add discounts (optional)

  • You can add discounts to the order by:
    • Applying a discount percentage.
    • Setting a custom final price.

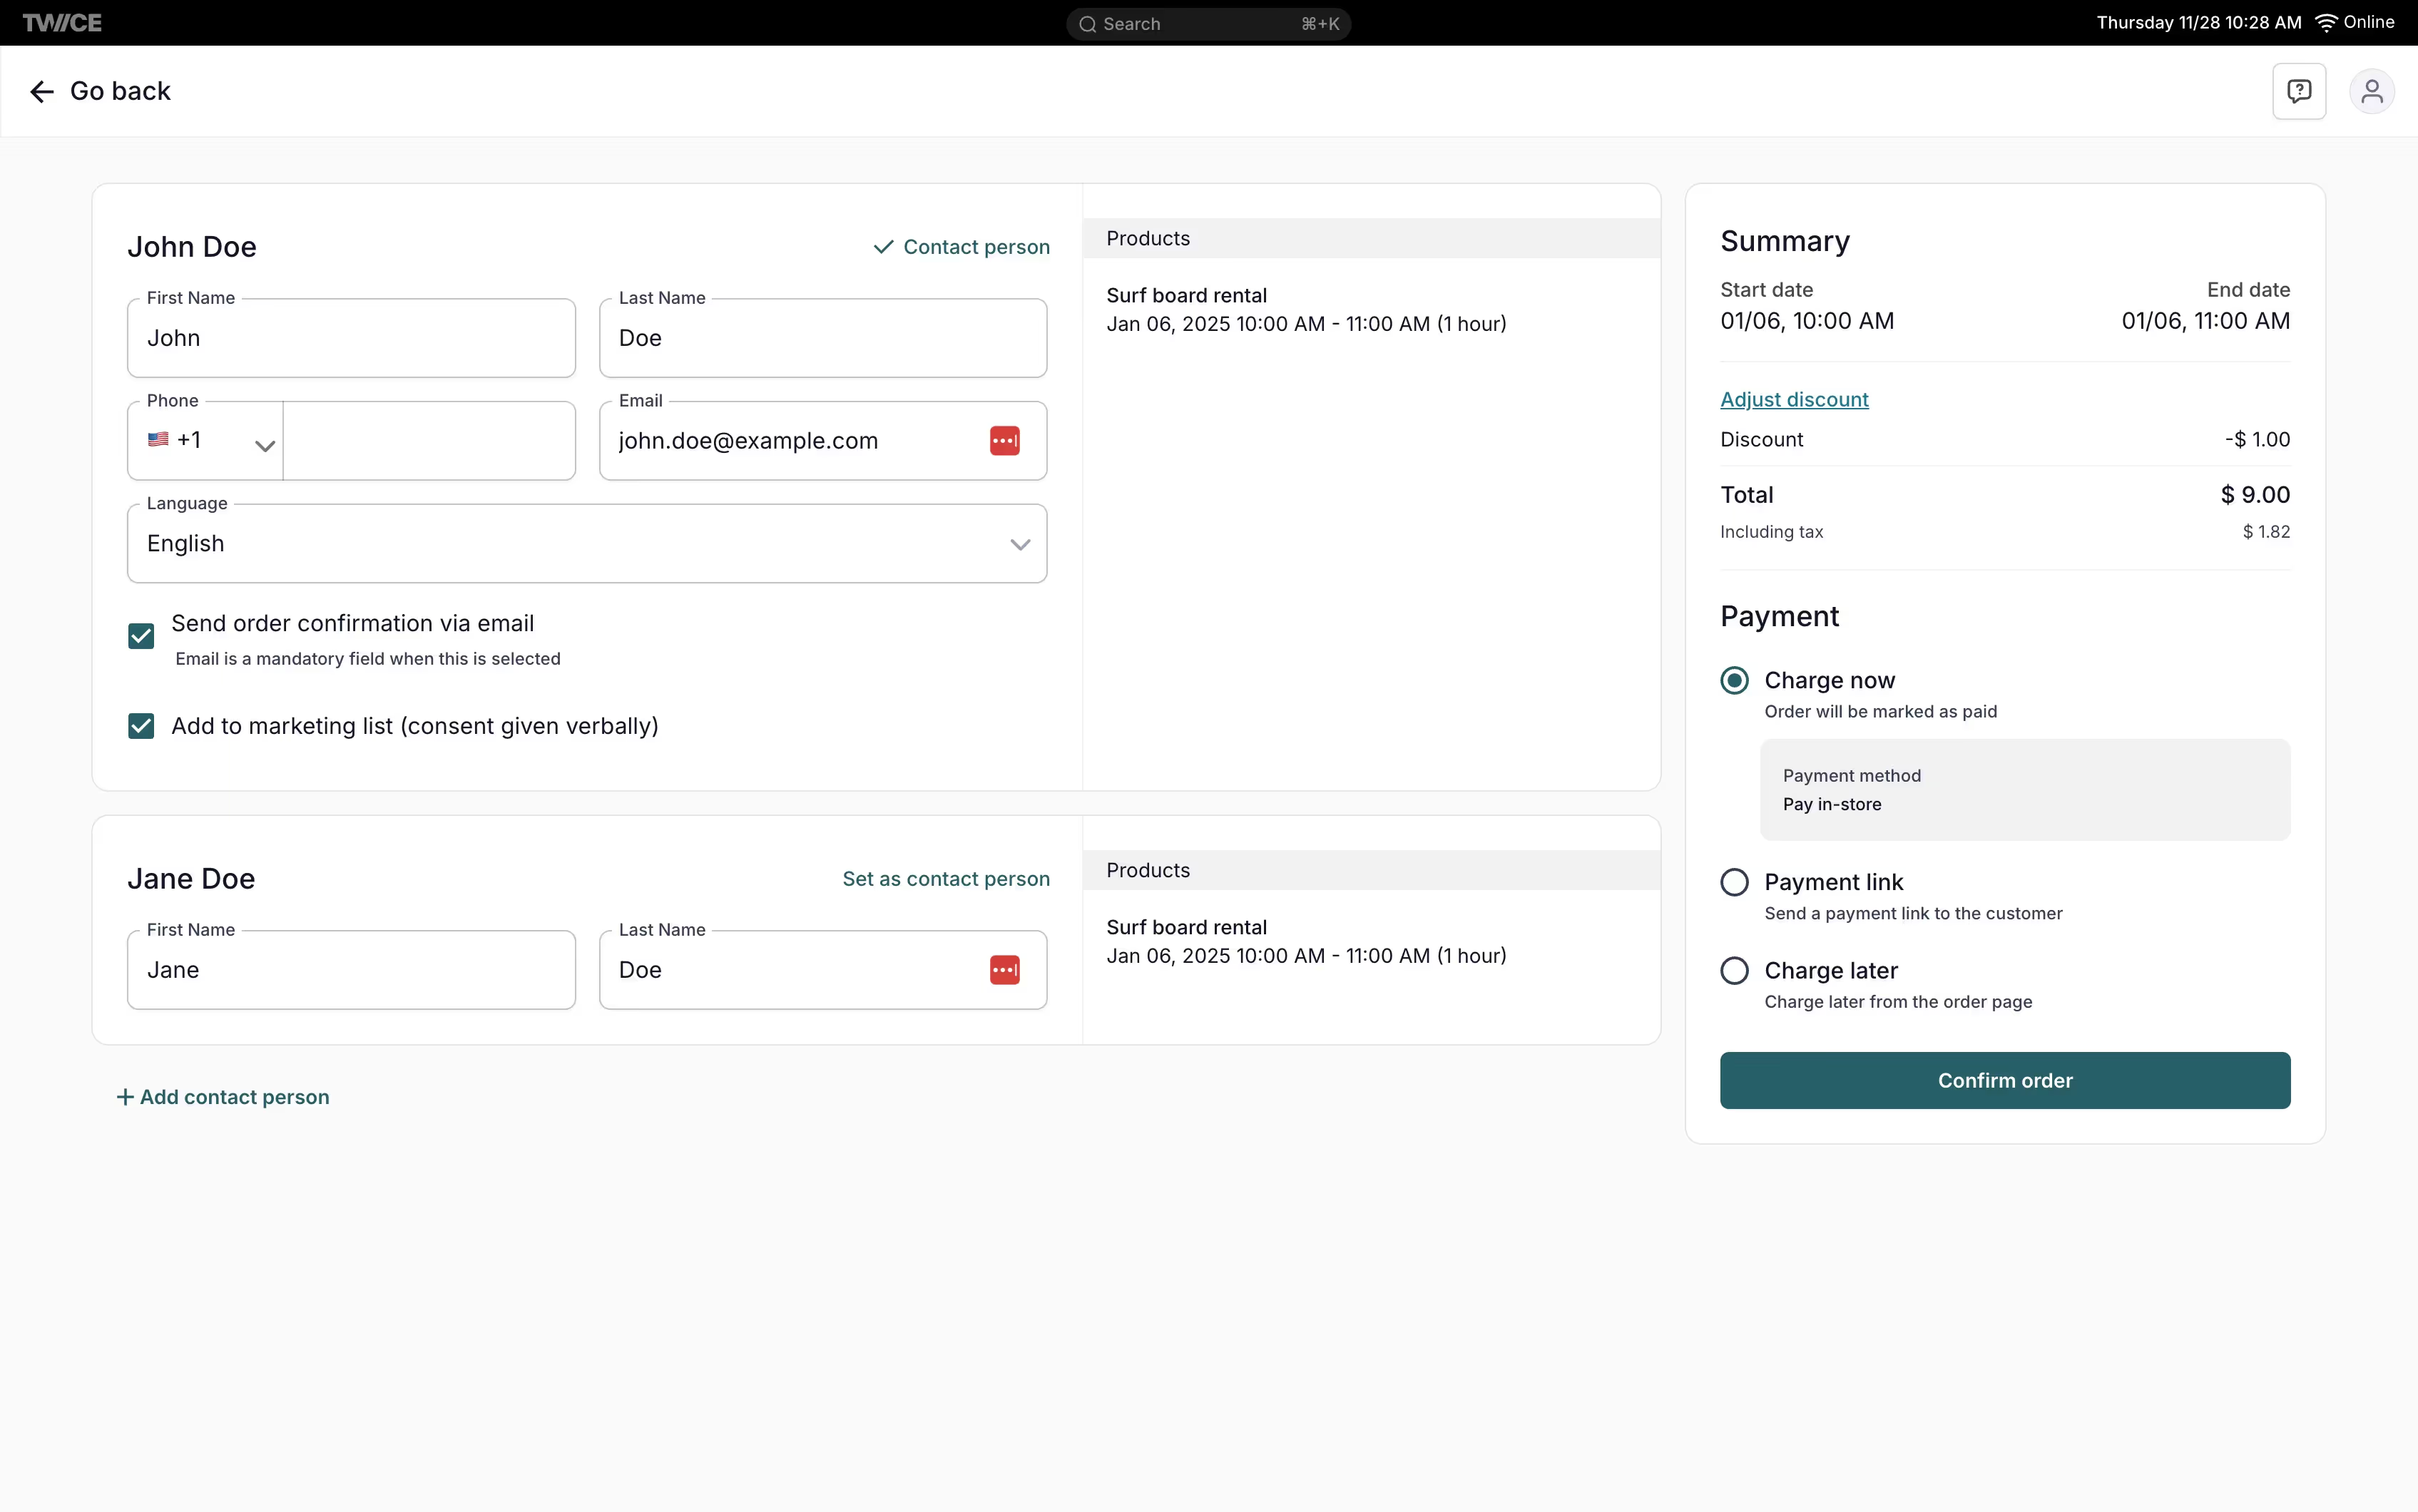
6. Customer information and payment

  • After you have added all customers and products, click the Continue button located at the bottom right of the screen.
  • On this page, fill in the Customer details:
    • The contact person (Customer 1 by default) requires at least first name, last name and email. For other customers, first and last name are required.
      • You can also change the contact person.
  • Toggle the Send order confirmation via email switch to send an order confirmation via email.
  • Click the Add to marketing list checkbox if the customer consents to join your marketing list.

7. Select payment option

  • Navigate to the Payment section.
  • Choose one of the following payment options:
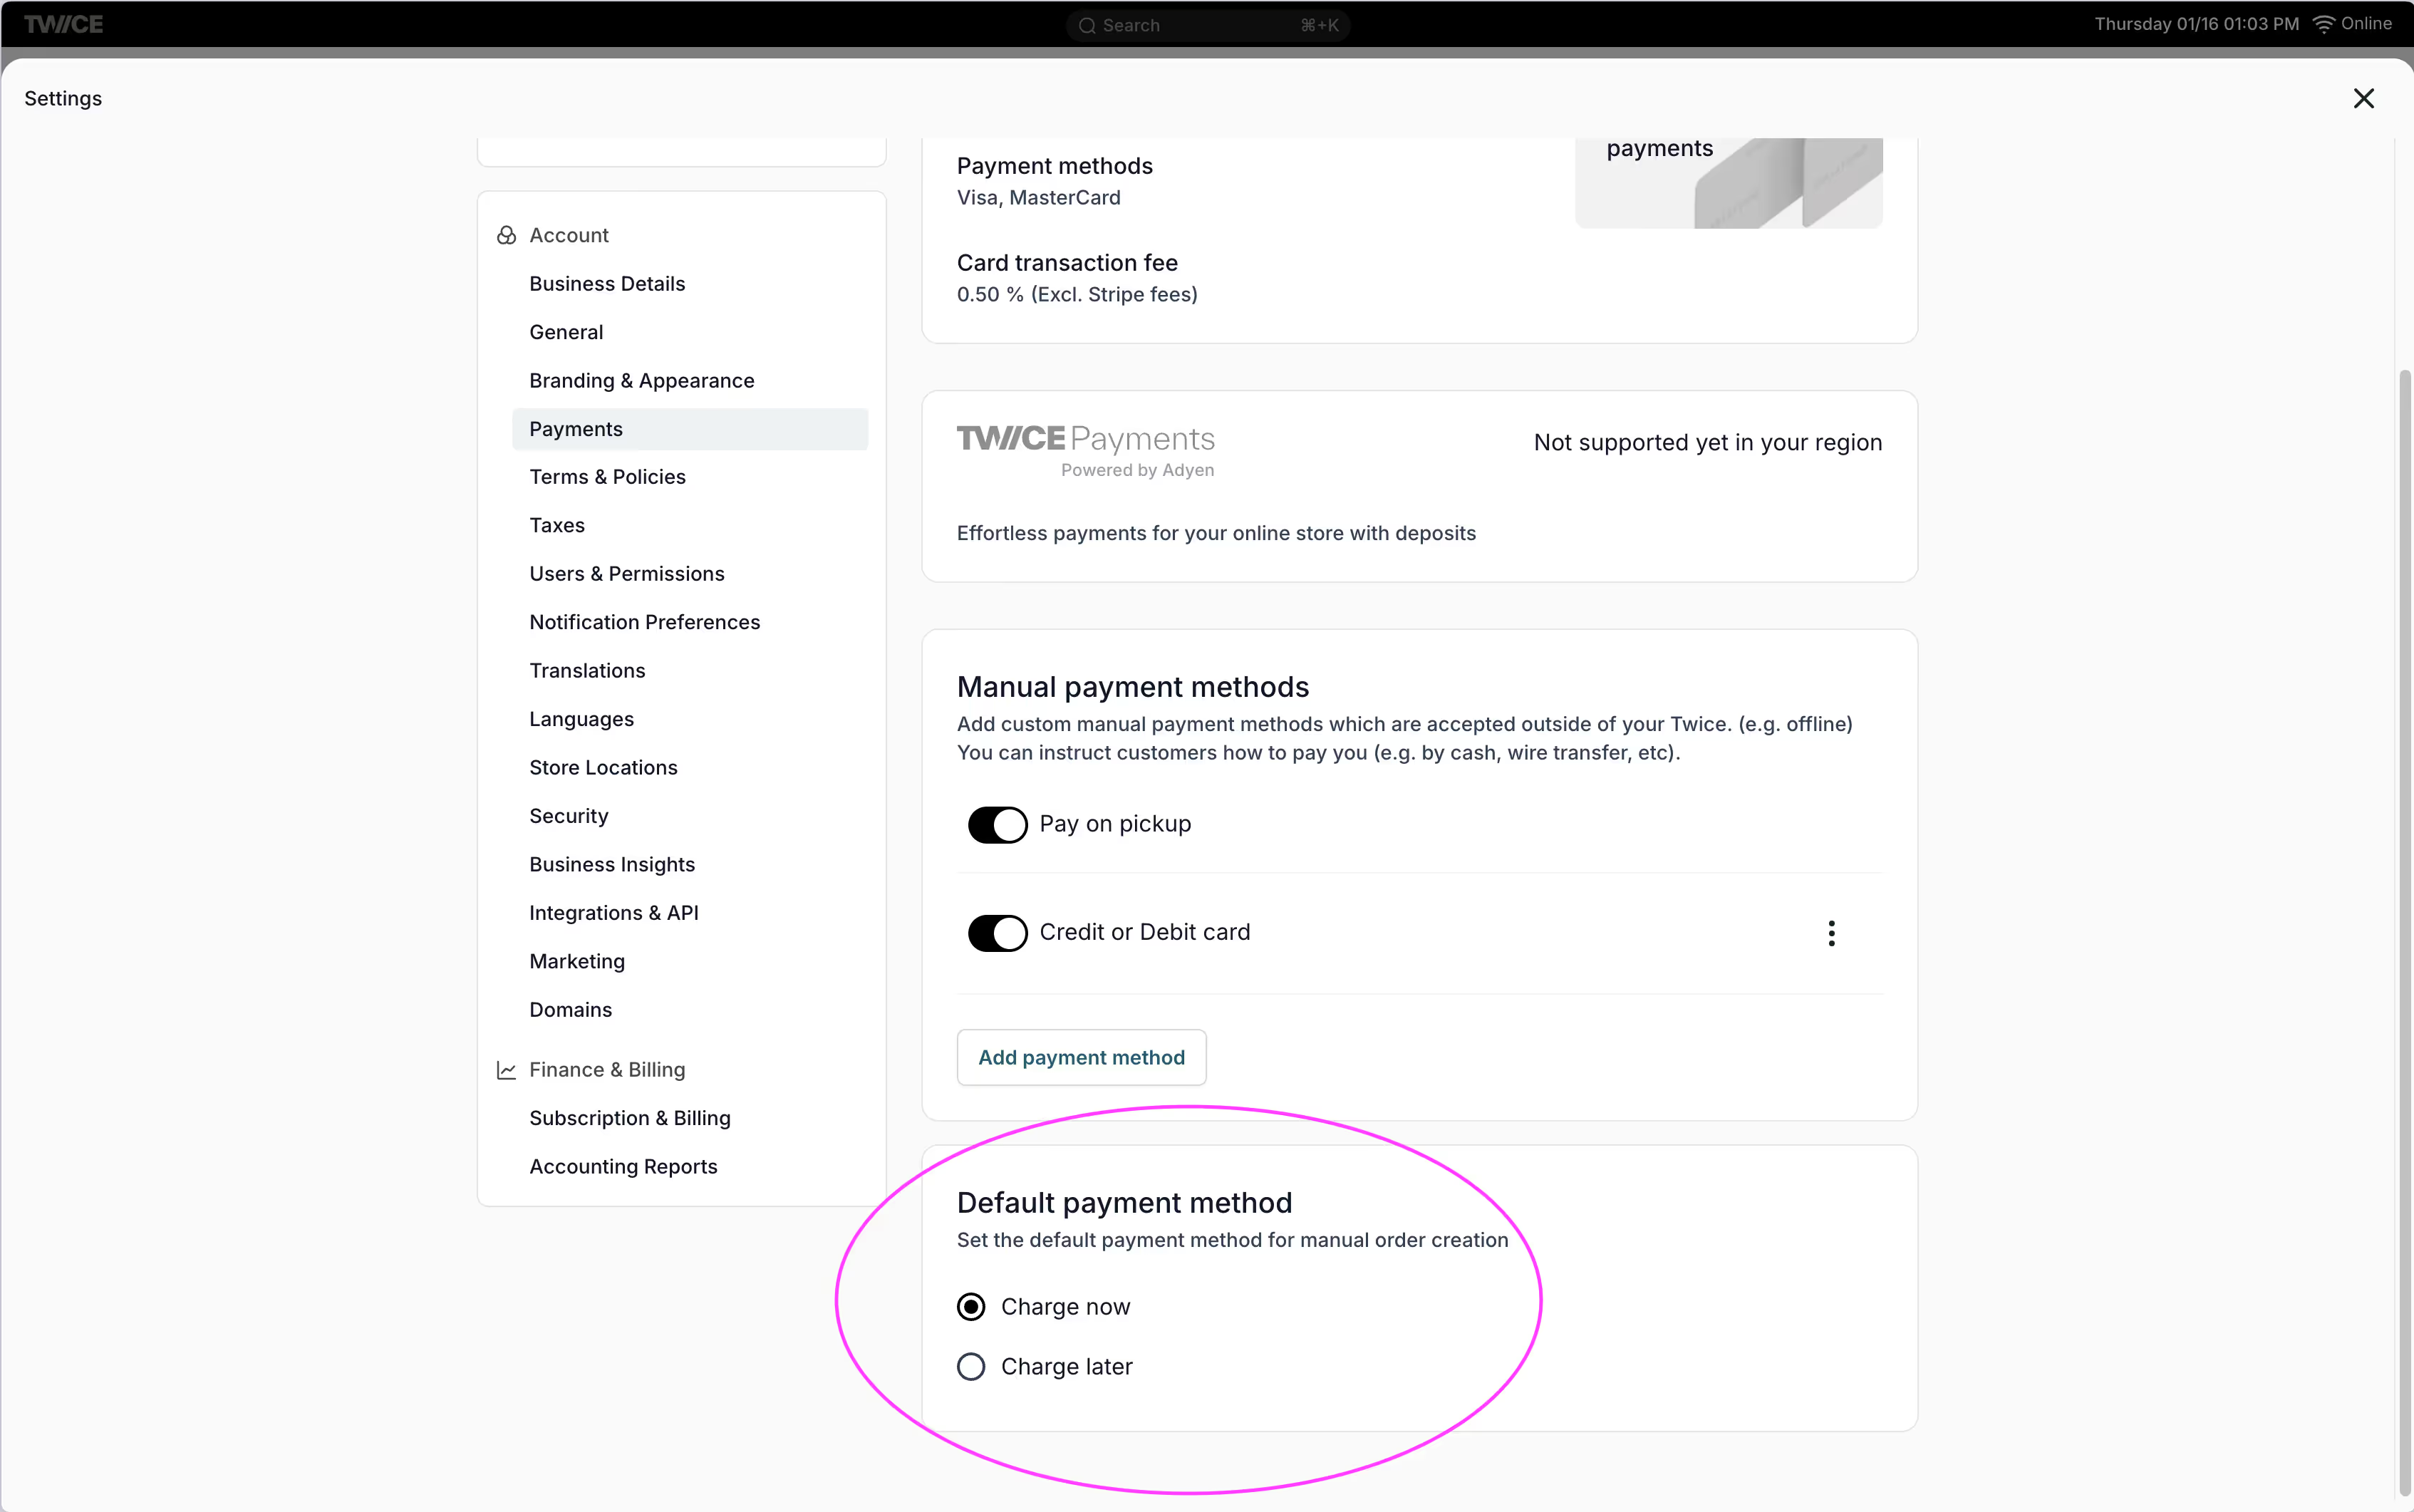
    • Charge now: Process the payment immediately using for example an external point-of-sale system.
    • Charge later: Create the order and mark it as unpaid.
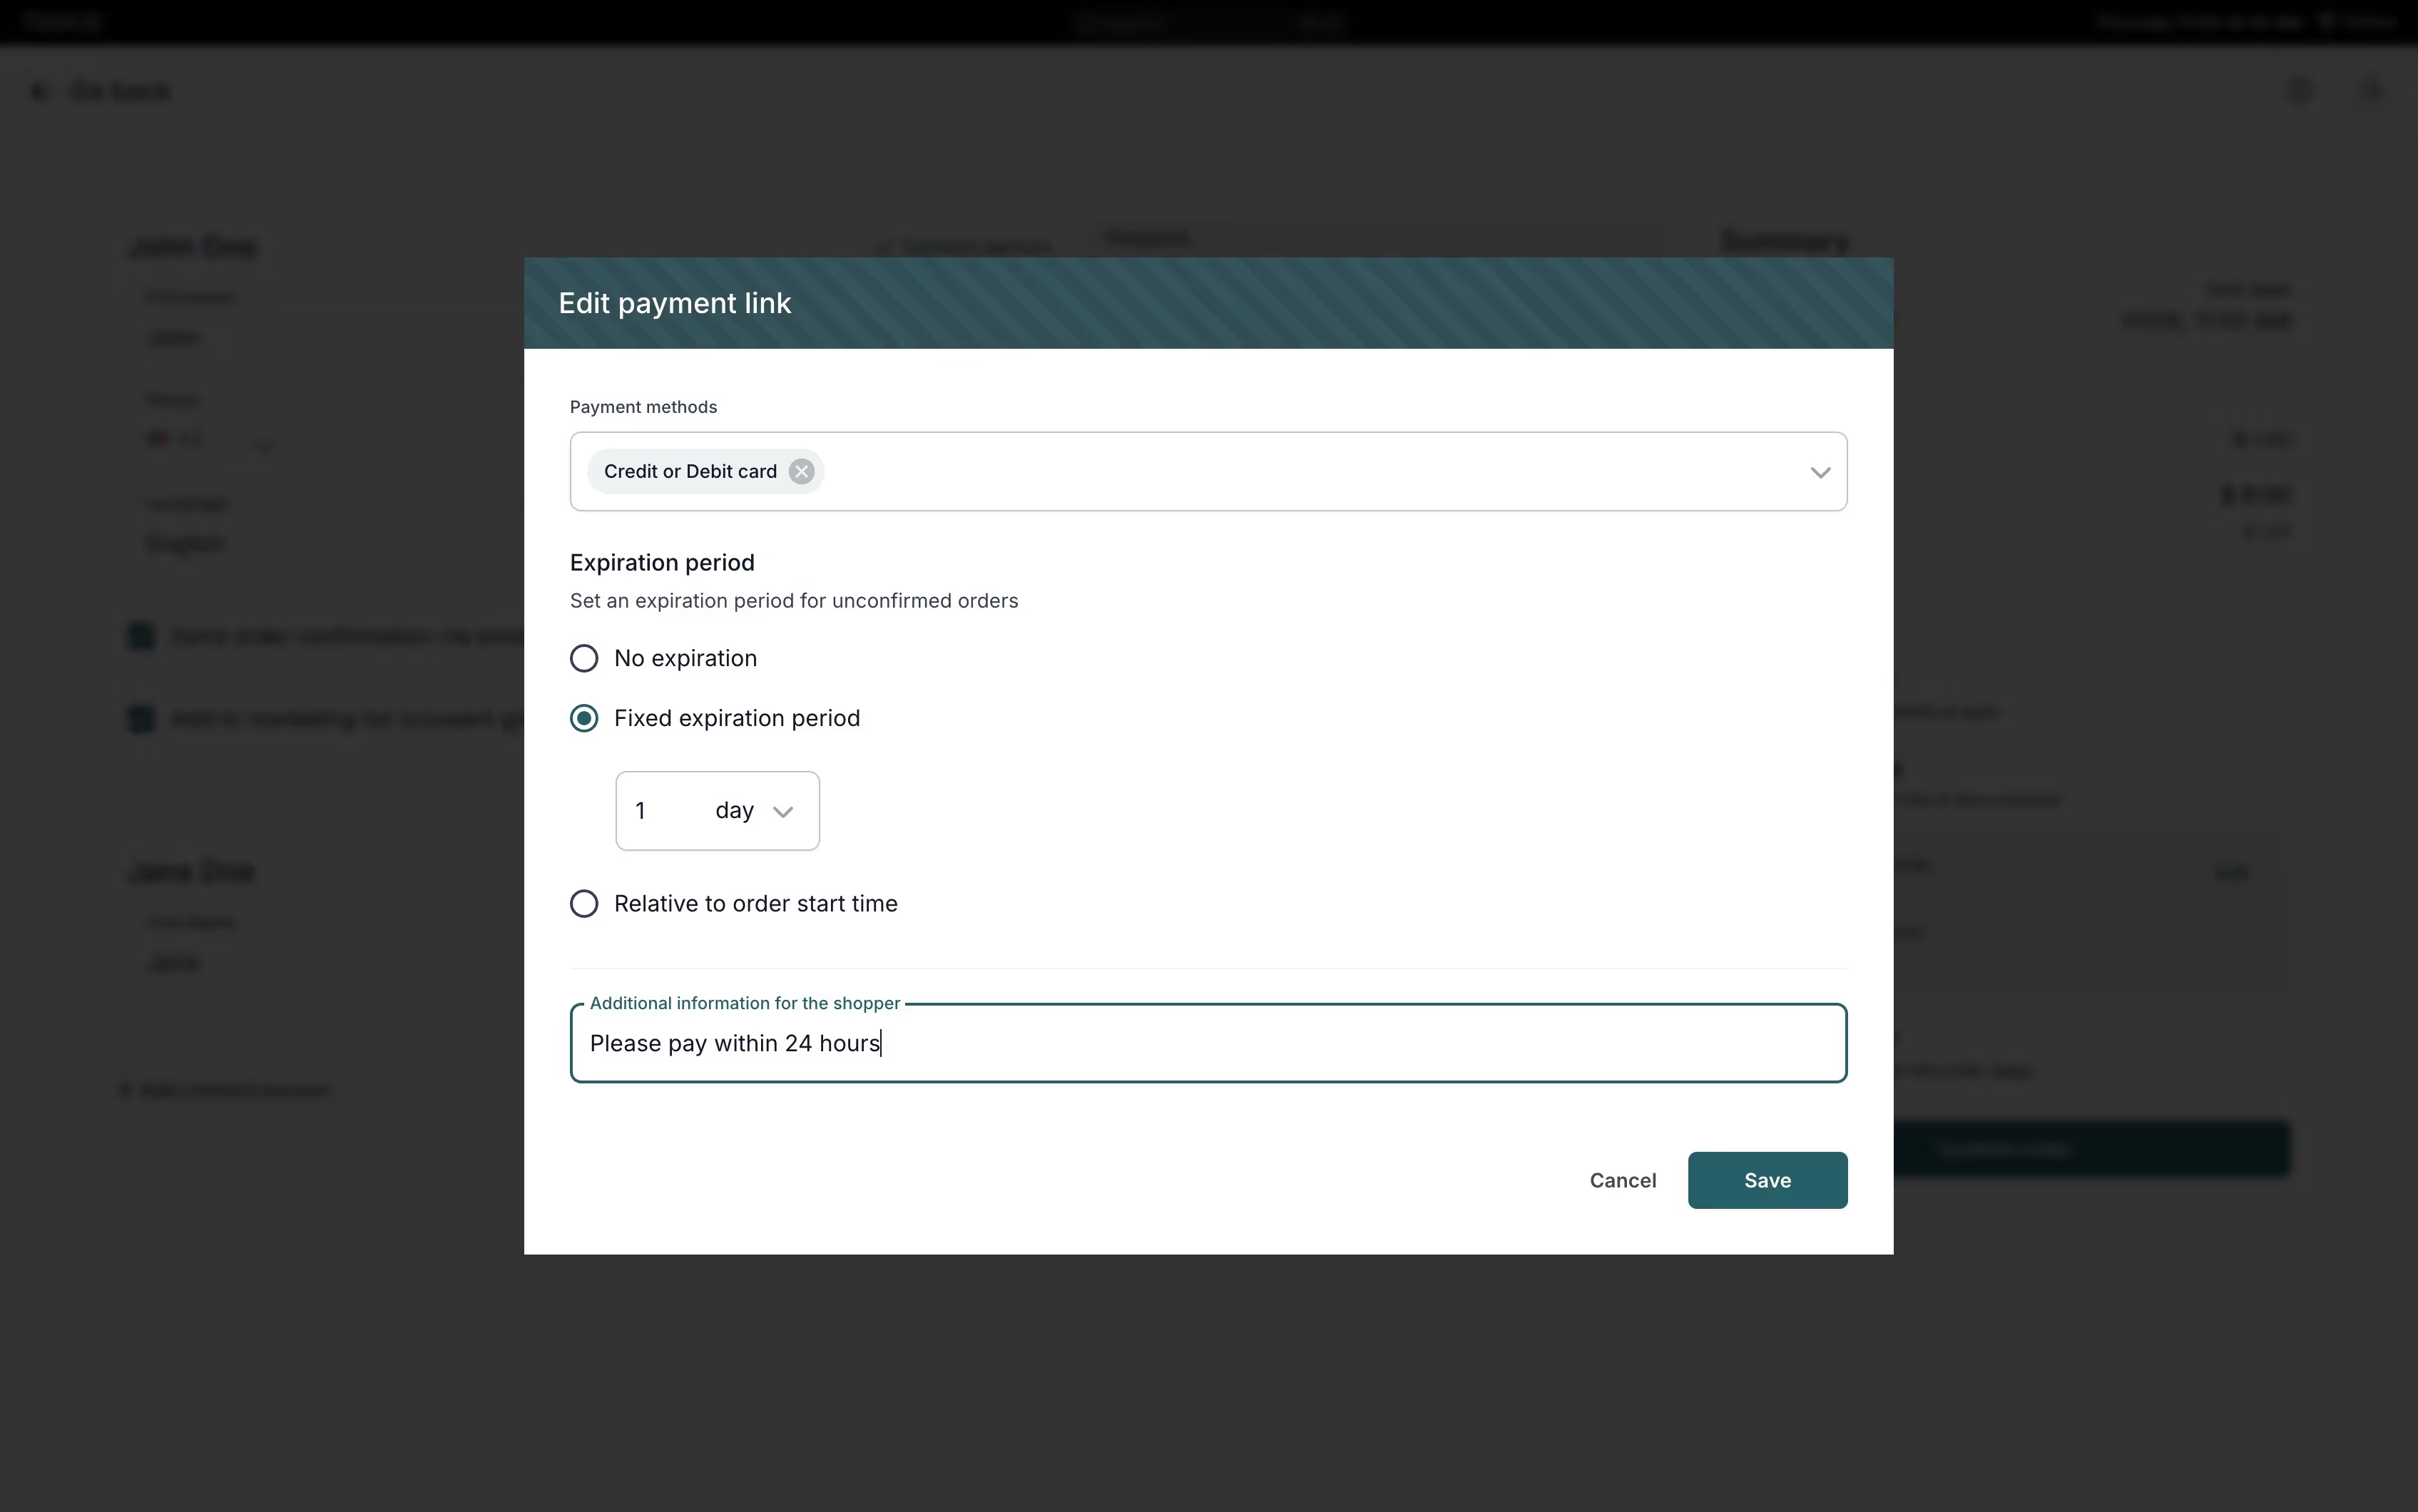
    • Send payment link: Send a payment link to the customer via email or SMS to complete the payment online.
      • For payment links you can edit which payment methods are available, if the link expires and add additional information.
  • Click Confirm Order to finalize the order.
    • All items will be reserved for the specified period, preventing other orders for those items during that time.

The order is now created and visible on the Orders tab.

Limitations: manual order creation does not support delivery, sales, or subscription products at the moment.
On this page

Start your circular business  with TWICE