TWICE 2.0 — Coming soon.
Learn more about the update
In this documentation, we'll focus on managing orders within TWICE Commerce. Understanding the different order views and how to interact with them is helpful for effectively handling bookings and transactions.
You can access all your orders through the navigation menu on the left side of the screen, where you will see three different views: upcoming, active, and completed orders. Sales orders are kept separately in the sales orders tab, which is only visible if there are active sales orders.

Each of these order views corresponds to the order lifecycle, and how you interact with them will vary slightly from one view to another.
When you open any order on the platform, you'll find an overview of the order that provides a set of tools to manage it effectively.
On the left side of the order detail view, you can find all people who are associated with that order. Each person has its own card, which displays their individual products.

Each card will also display a print and comment option for you to leave internal notes or create a print out only for that person.
On the right side of the screen, you have access to information about the whole order, such as the order number, when it was created, which channel it was created in, and the start time of the booking. The summary also displays the responsible person for the order and their contact information.
You have also access to separate order summary and payment summary views and the operational buttons.
The upcoming orders view contains all your booking-based (rental and subscription) orders scheduled to start today or in the future.
After you open an upcoming order in the TWICE Admin, you'll find a range of tools for managing the booking before it starts.
You can add and edit the people and their products.
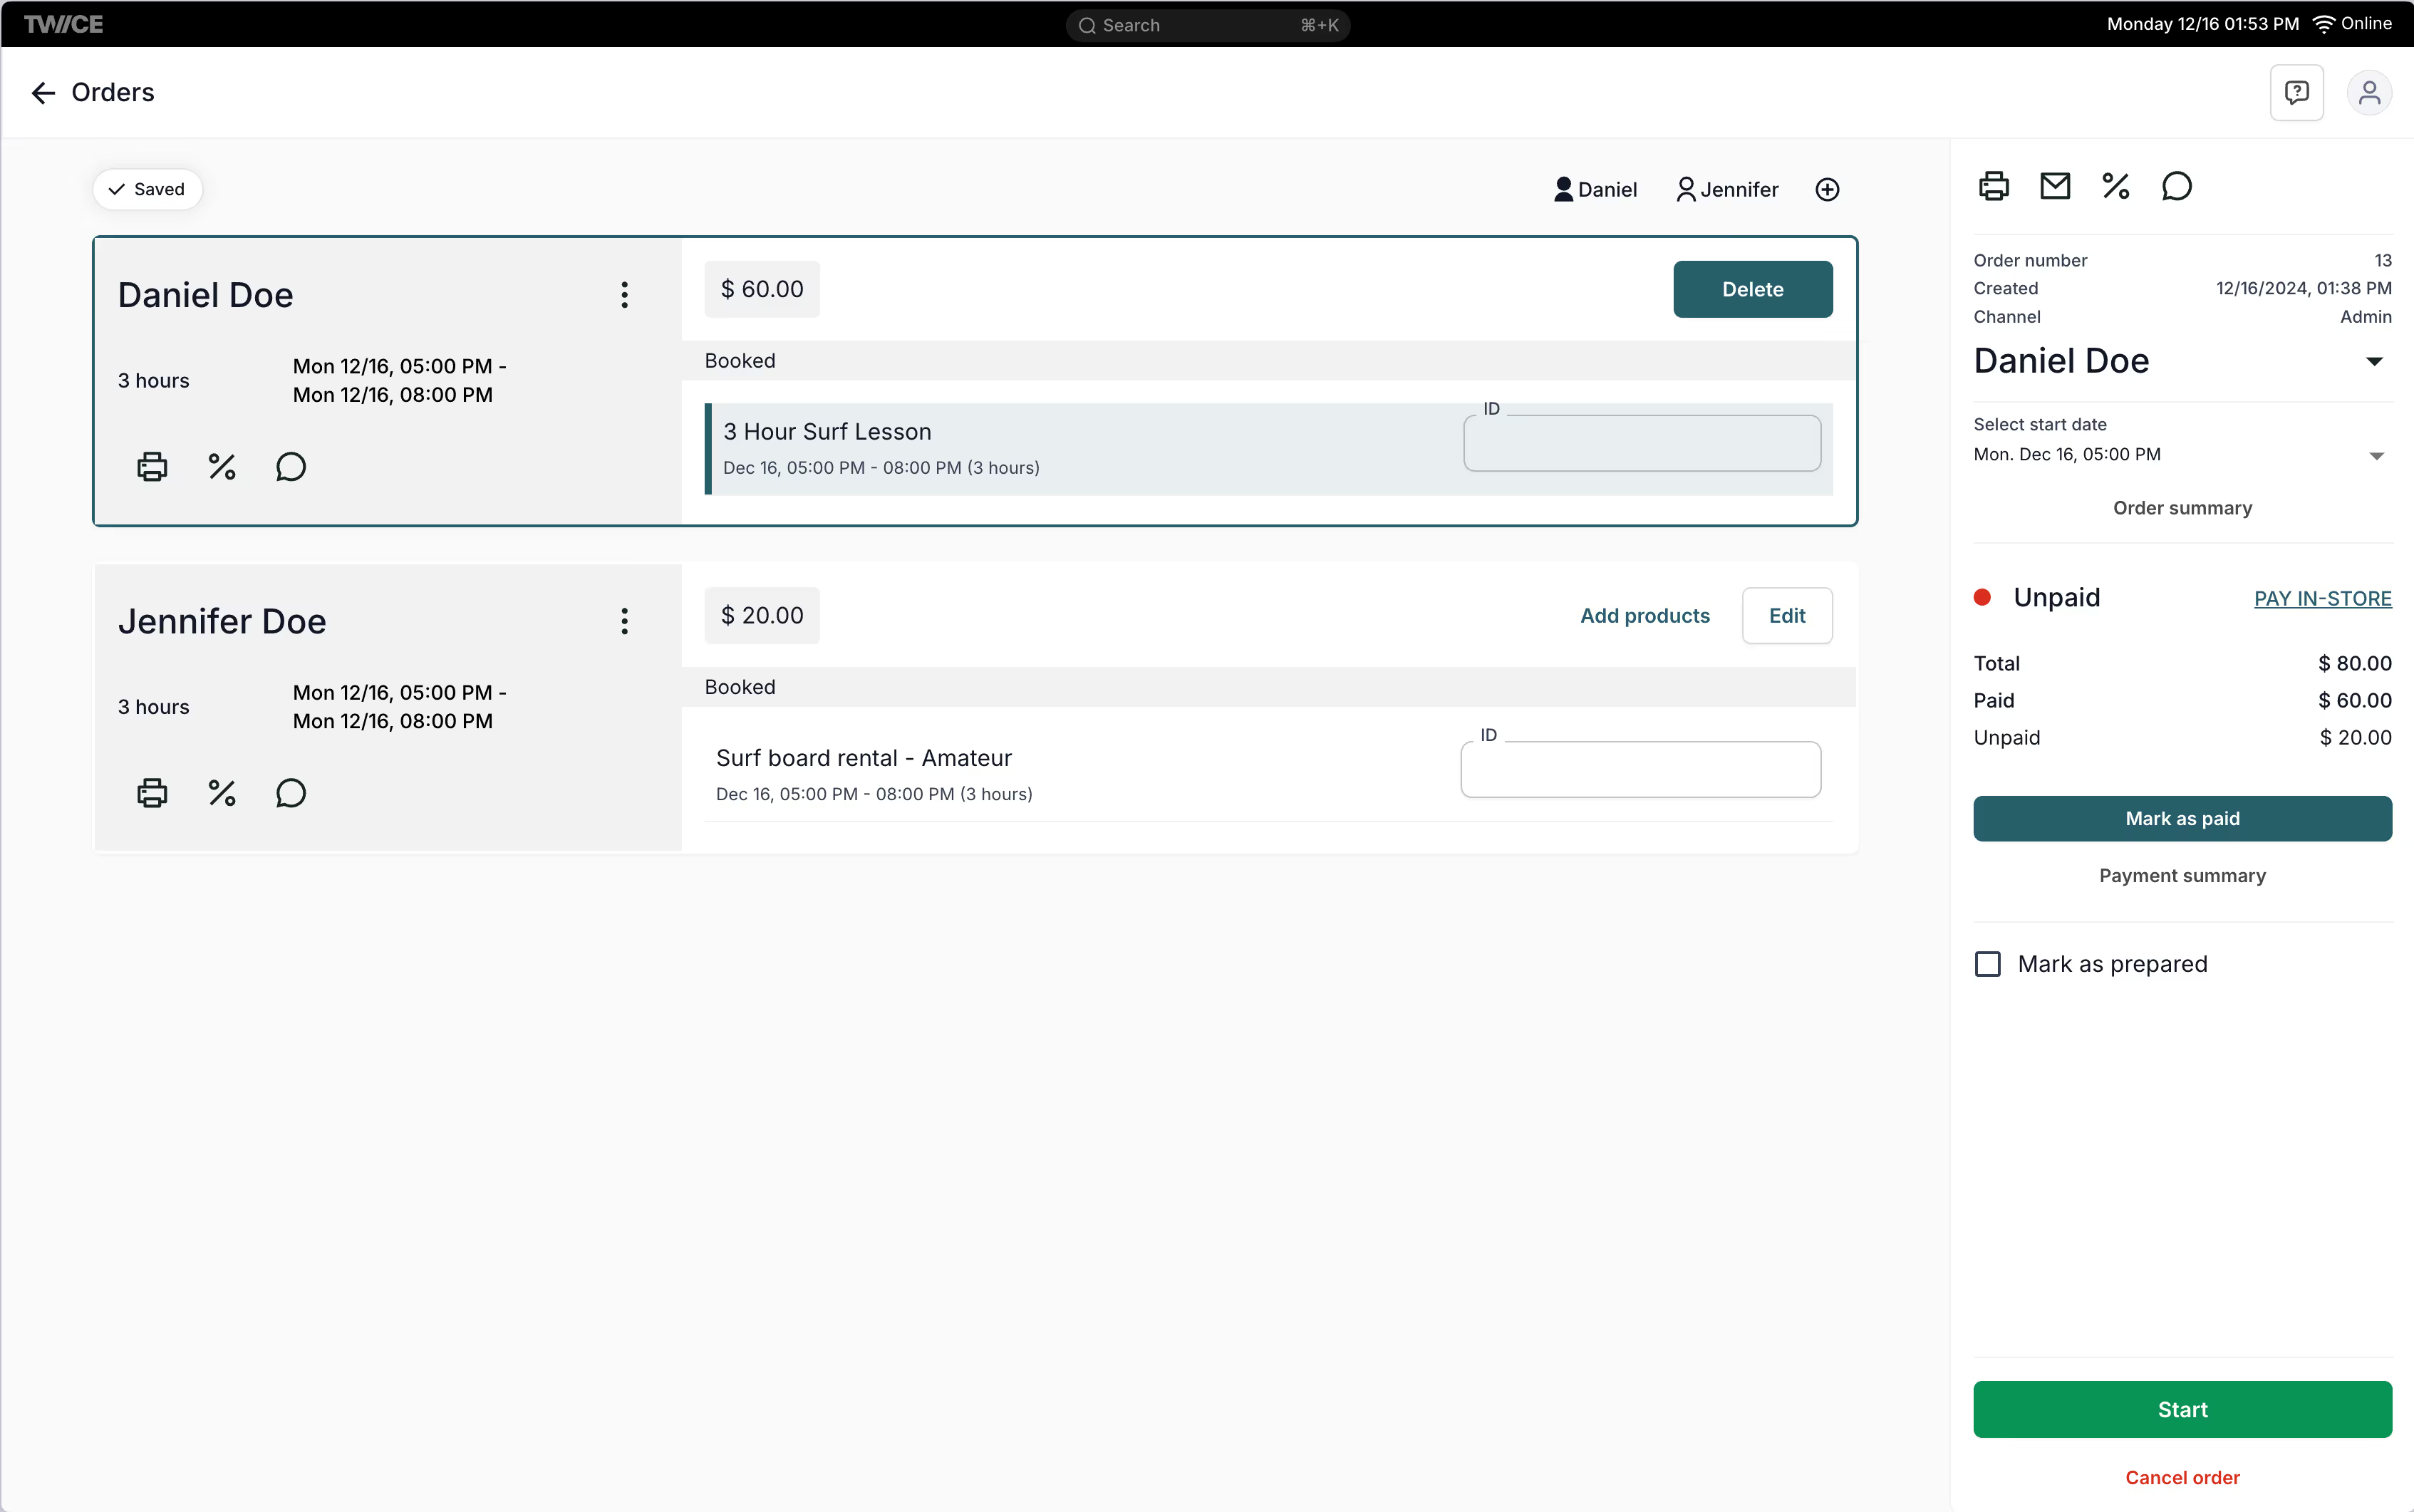
To edit the details or delete a person from the order, click the three dots next to their name.

To edit existing products, such as the start time, duration and price, click the Edit button on the top right corner of the person's card.

To add new products for the person, click Add products on their card.

To delete a product from the person, select it and click Delete.
If you are utilizing our individualized inventory, where you manage the availability based on individual inventory items and collect valuable usage information, you need to select which individual item is used for the order. You can do it by selecting the ID field and selecting the article you want.
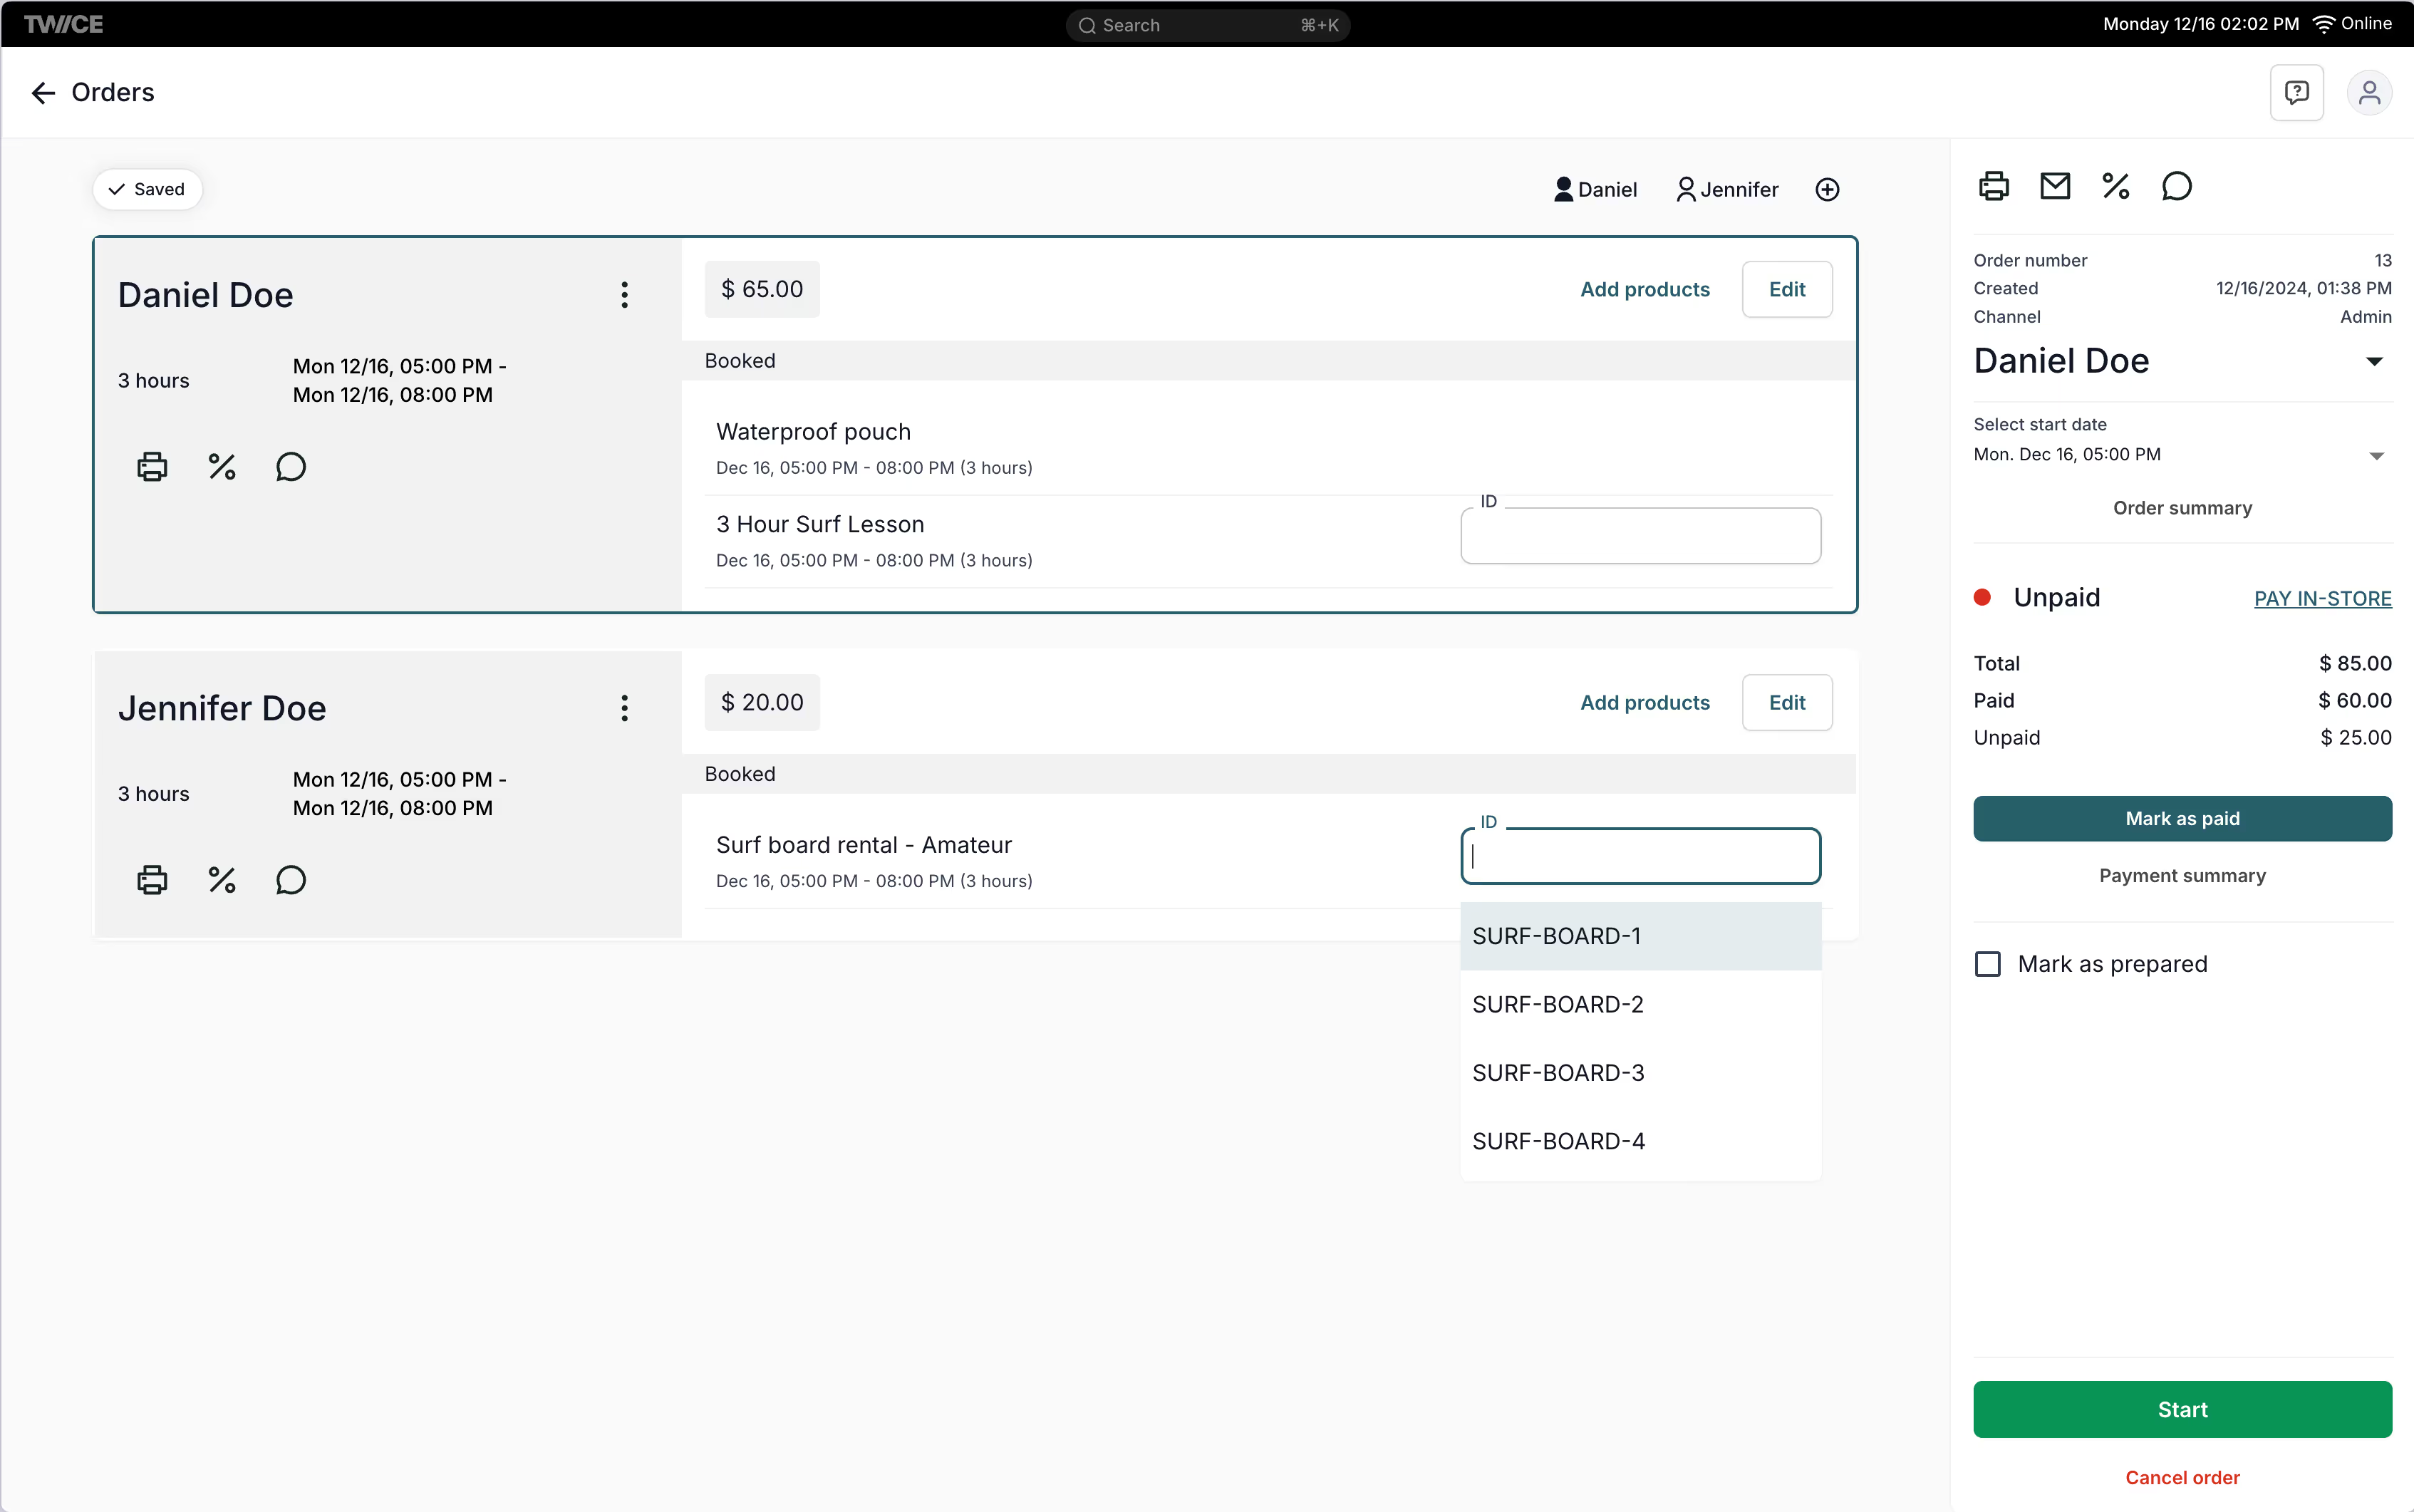
Tip: you can also utilize a barcode scanner to input the ID.
You can control the payment status of the order, depending on the payment method used. If the order was prepaid through the online store or payment link, the order is marked automatically as paid.
The payment summary shows the payment details and enables you to do a refund or print the receipt.

If you are using the security deposits, you can also access and edit the amount for each person. Learn more about working with automatic security deposits and manual security deposits.

If the order was paid using the online store or payment link, the security deposit is automatically reserved. If you are making any changes to prepaid order, you can manually reserve the security deposits.

If the order was created without online payments, you can mark the order and the security deposits as paid.
You can print the (customizable) order confirmation for the whole order on through the printer icon on top of the order summary view.

You can also send the standard order confirmation through email to any address you want.
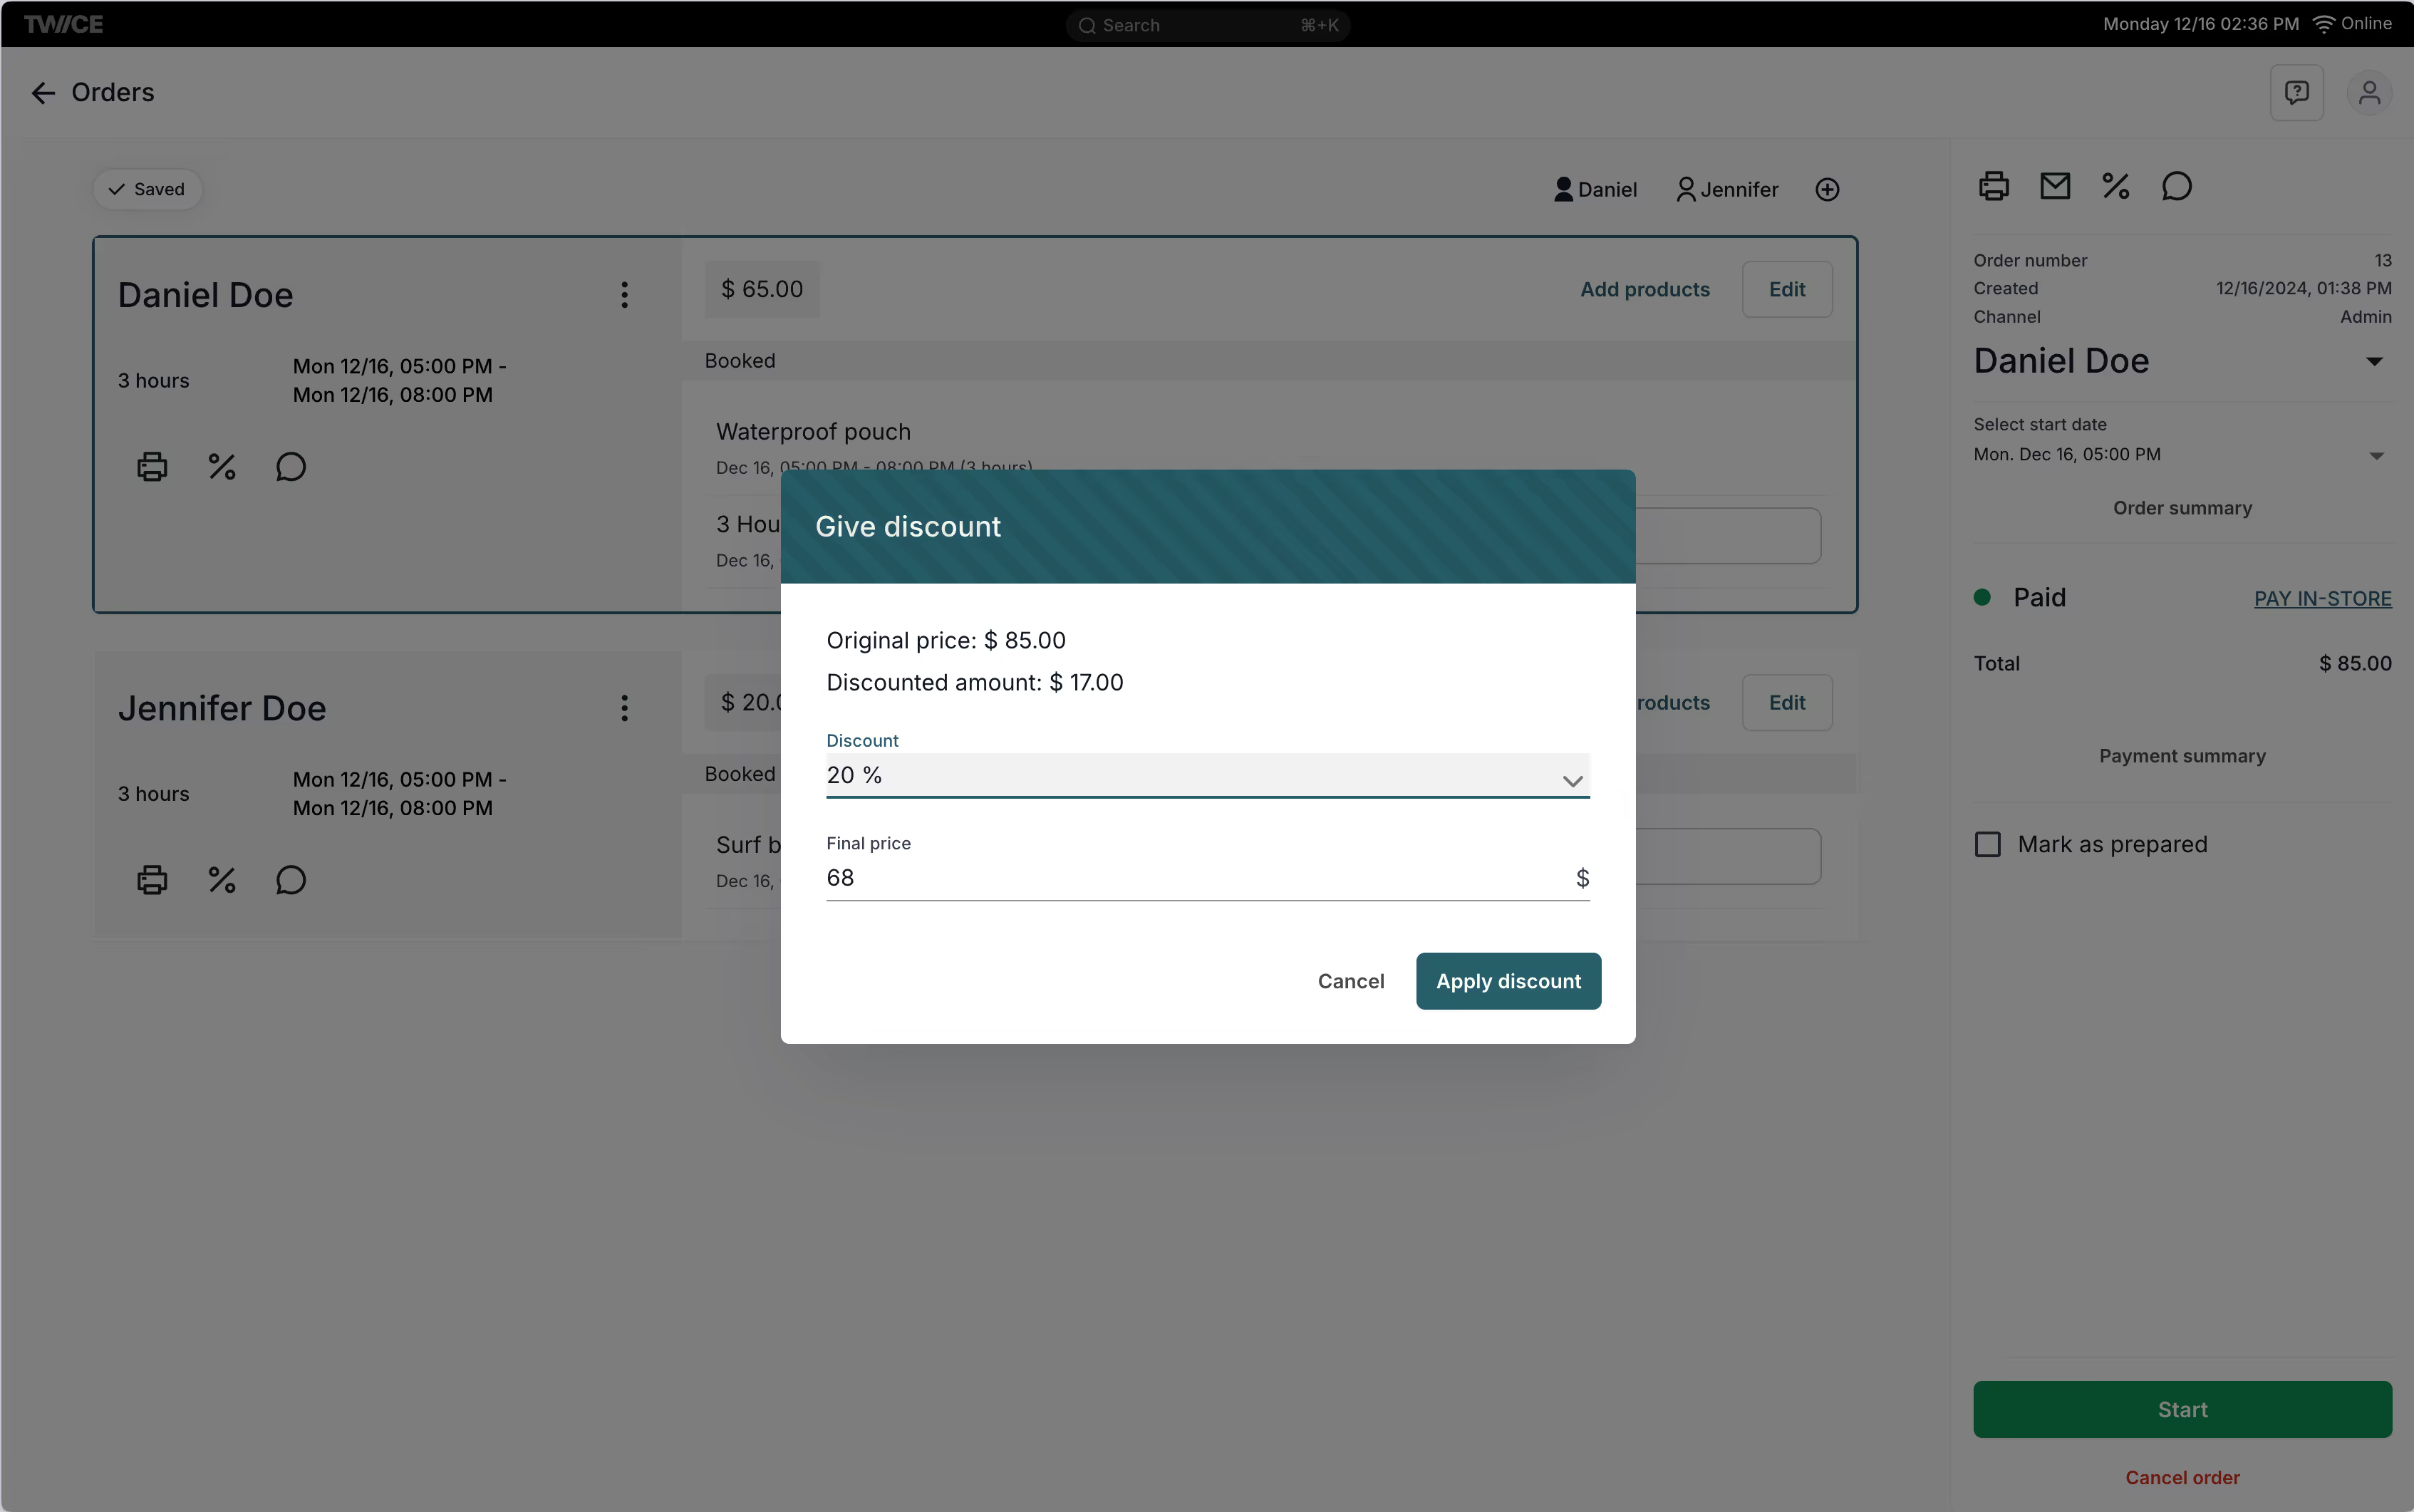
You can also add internal comments to the order and apply discounts based on percentage or fixed amount.
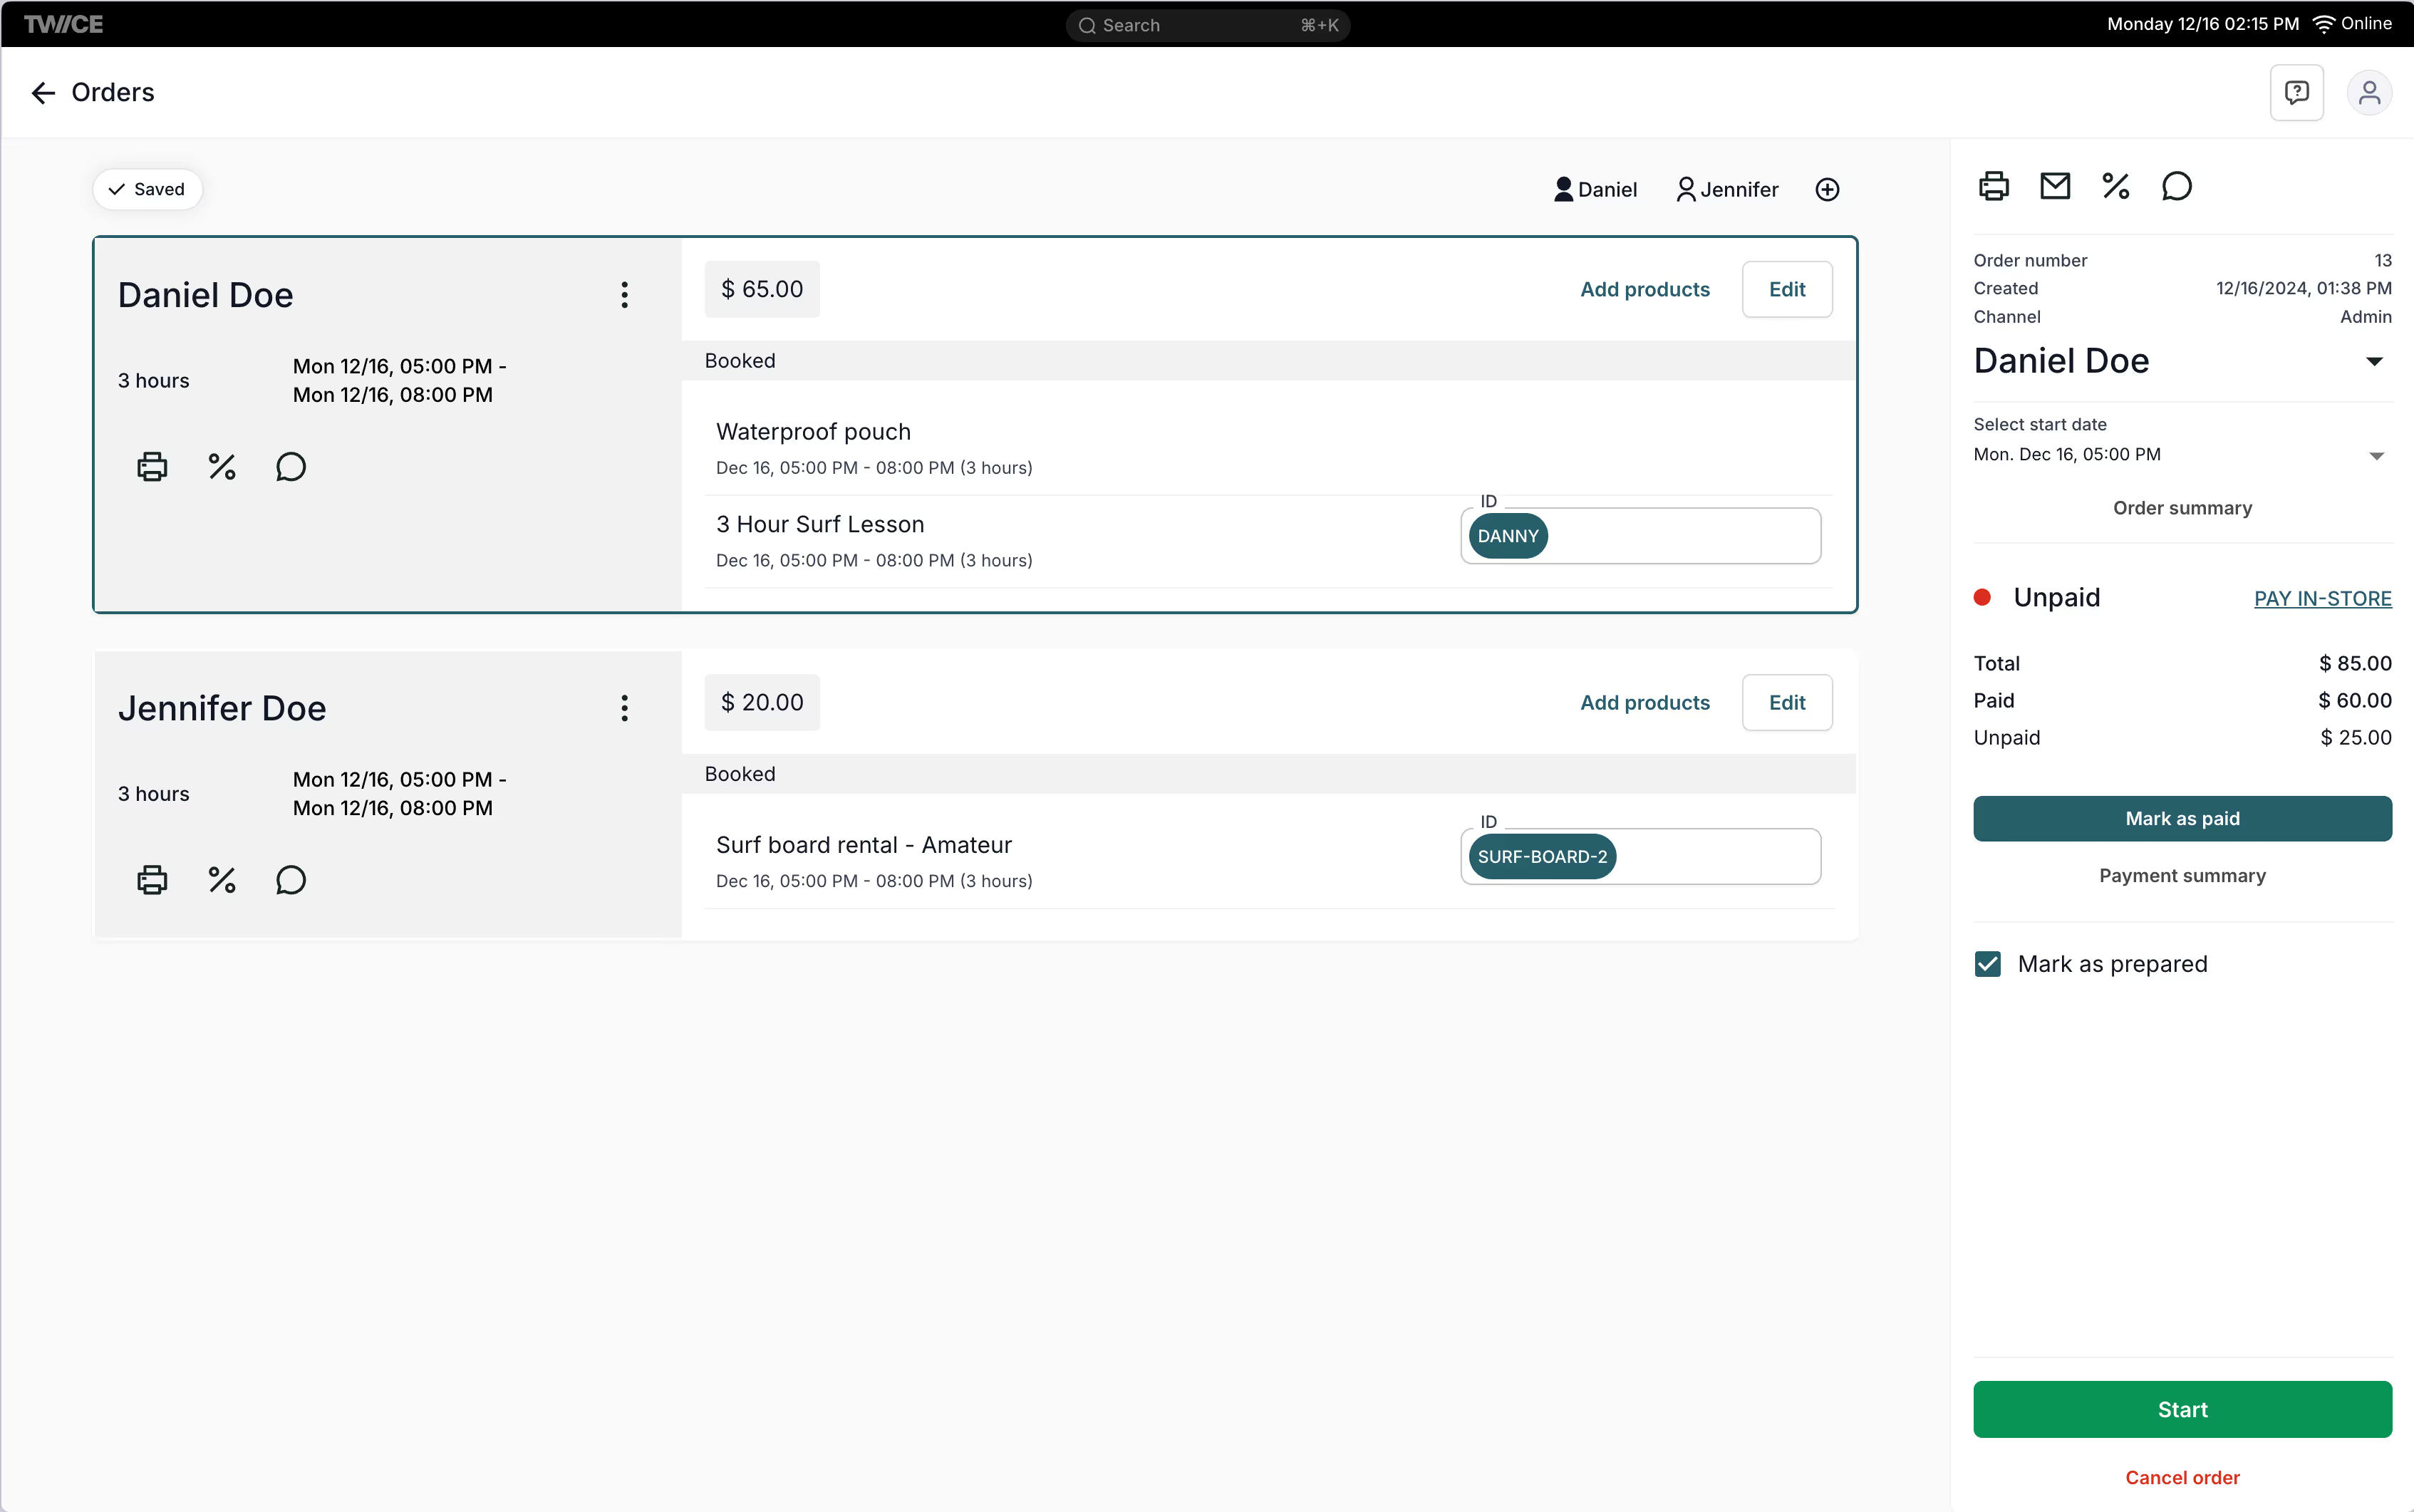
When you have assigned your items to the order and it is ready to be handed out for the customer, you can Mark it as prepared. This adds clearly visible Prepared to the order on the orders view.

When you have handed out the equipment to your customers, you can click the Start button.
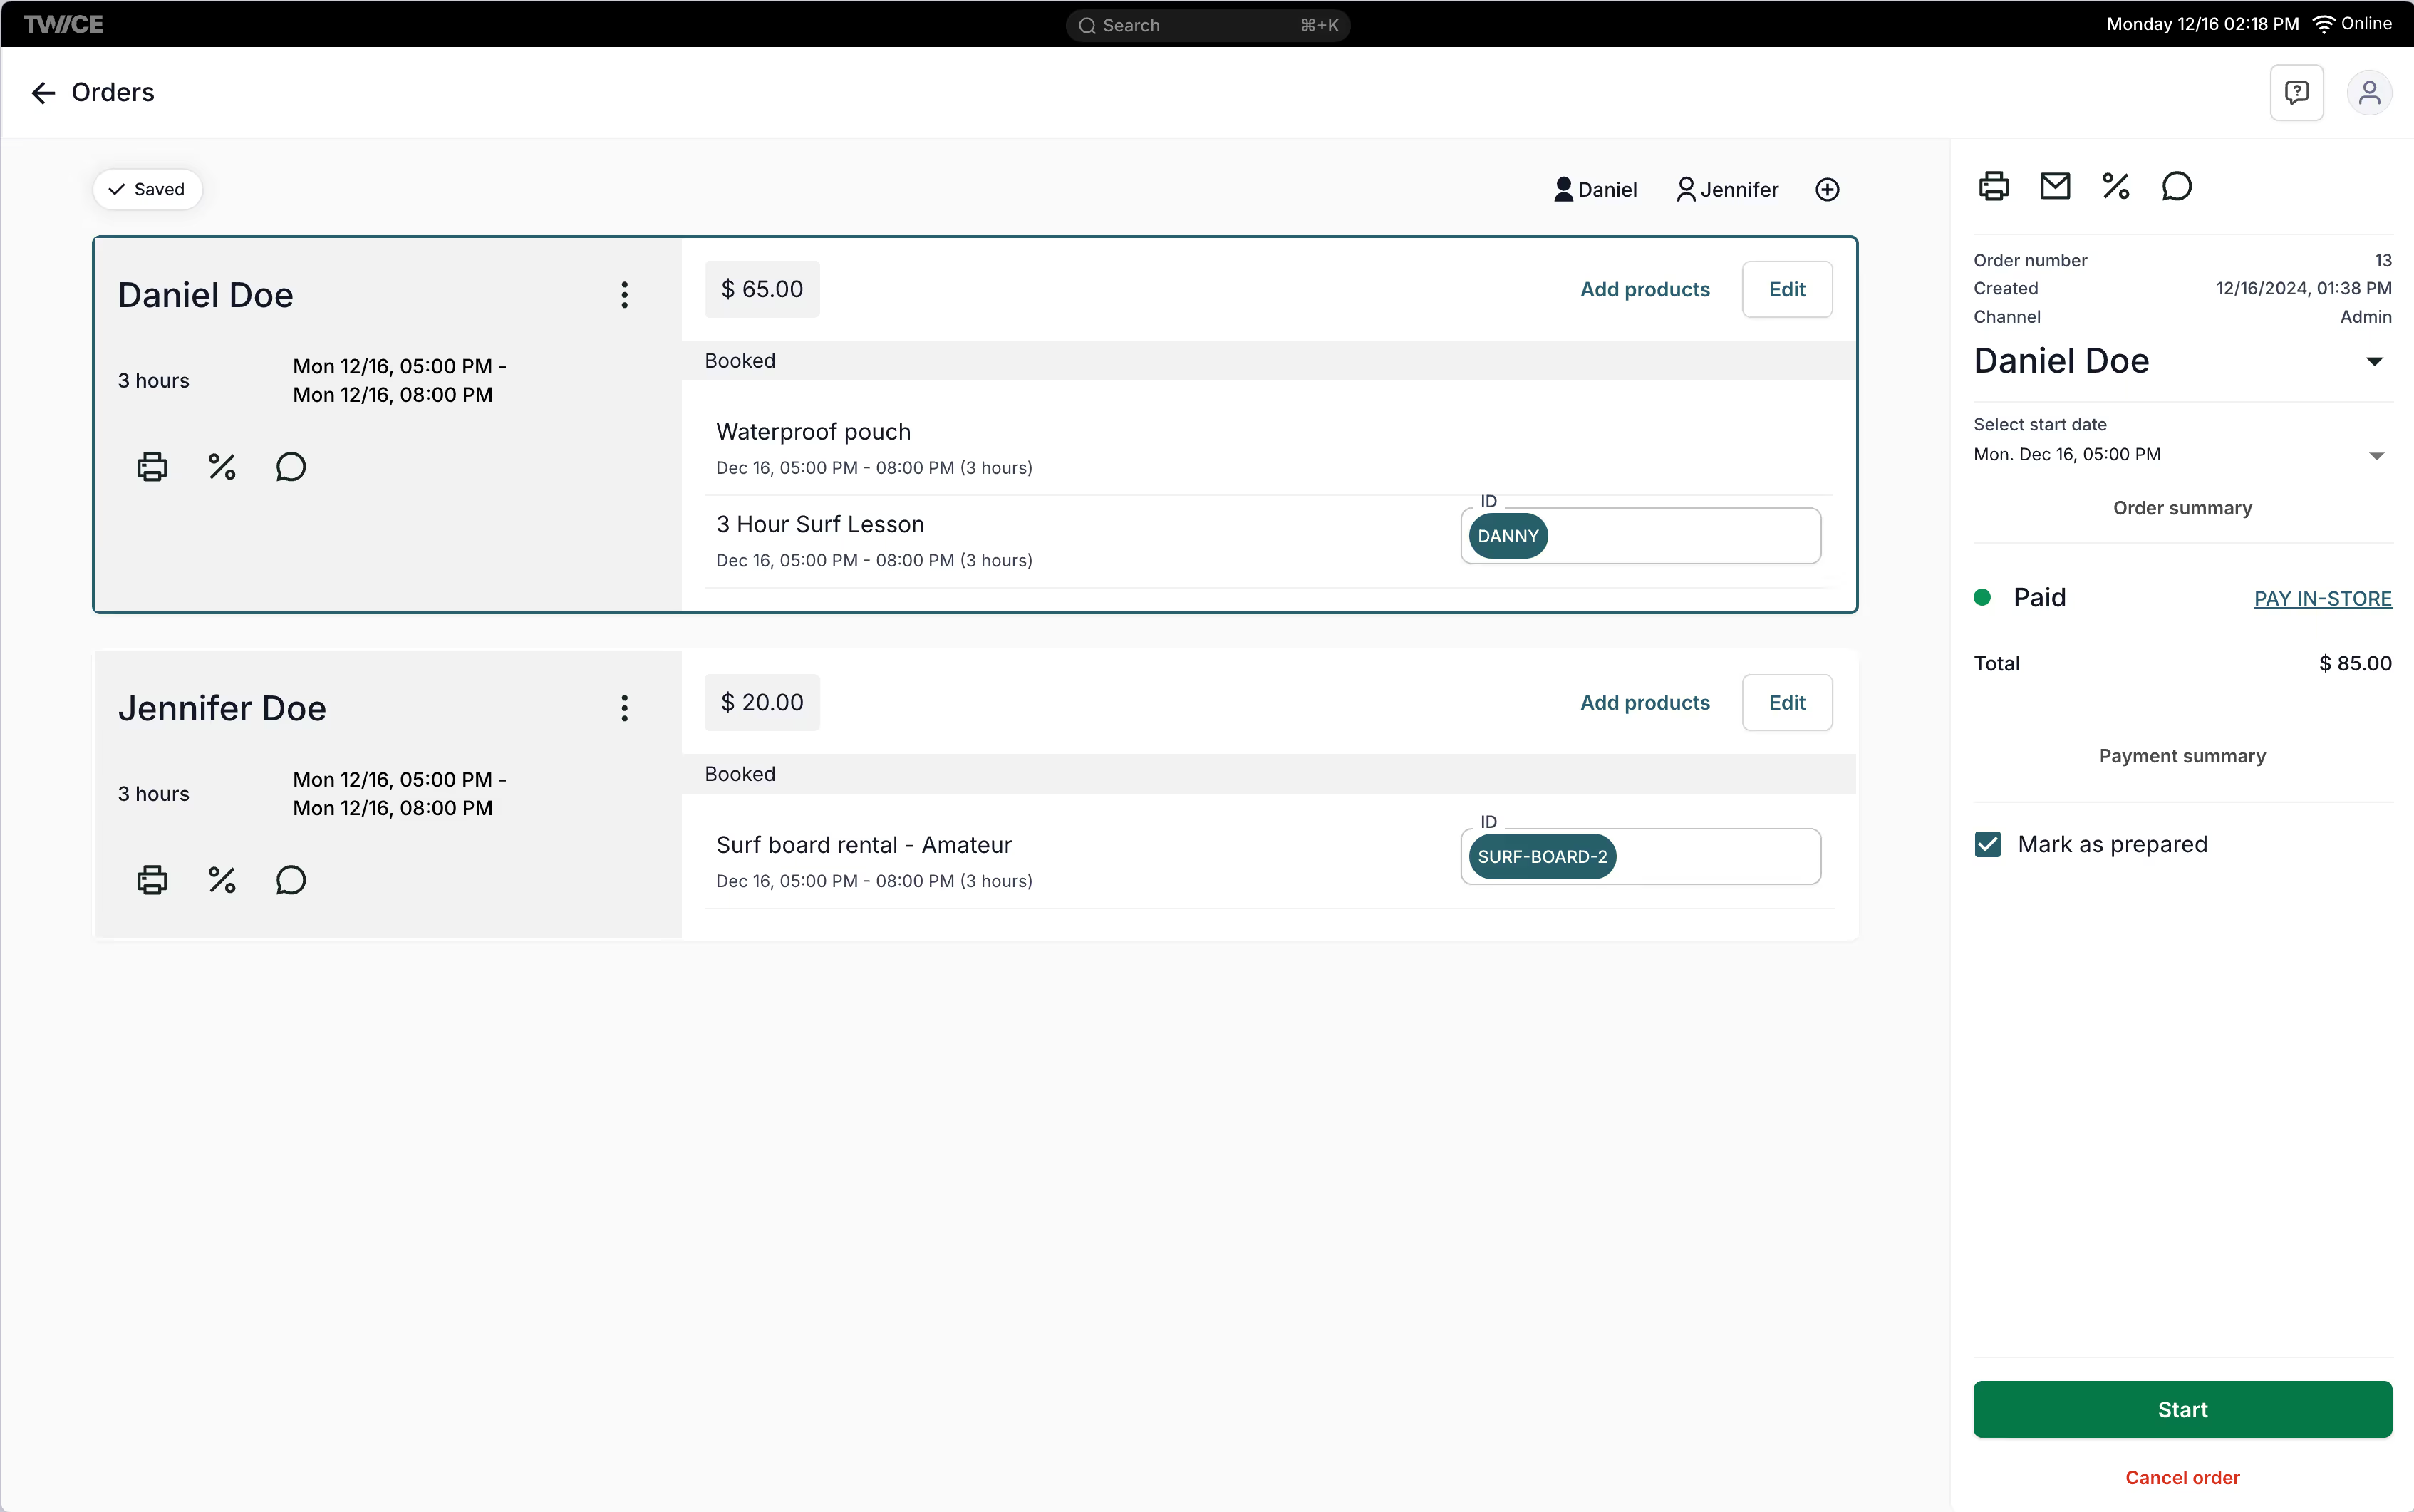
If you start the order within +/- 15 minutes of the booked start time, the Start button will turn into an End Order button. If the start time differs more than 15 minutes from the scheduled time, you'll see a pop-up window where you can choose to either keep the original end time or adjust it to match the duration.

After you have started the order, it is visible under Active orders view.
The active orders view is where you can view all your ongoing booking orders. In this view, you'll find tools for quick access to key information, as well as ways to directly manage active bookings.

You can control the active orders in similar way as upcoming orders. You can add new people, add products and edit them. If you want to remove people or products, you have to click Cancel start on the summary panel bottom right and do the edits.
You have multiple ways to control the active order when the customer returns their equipment.
If you want to only return individual products, you can select it and click the Return button.
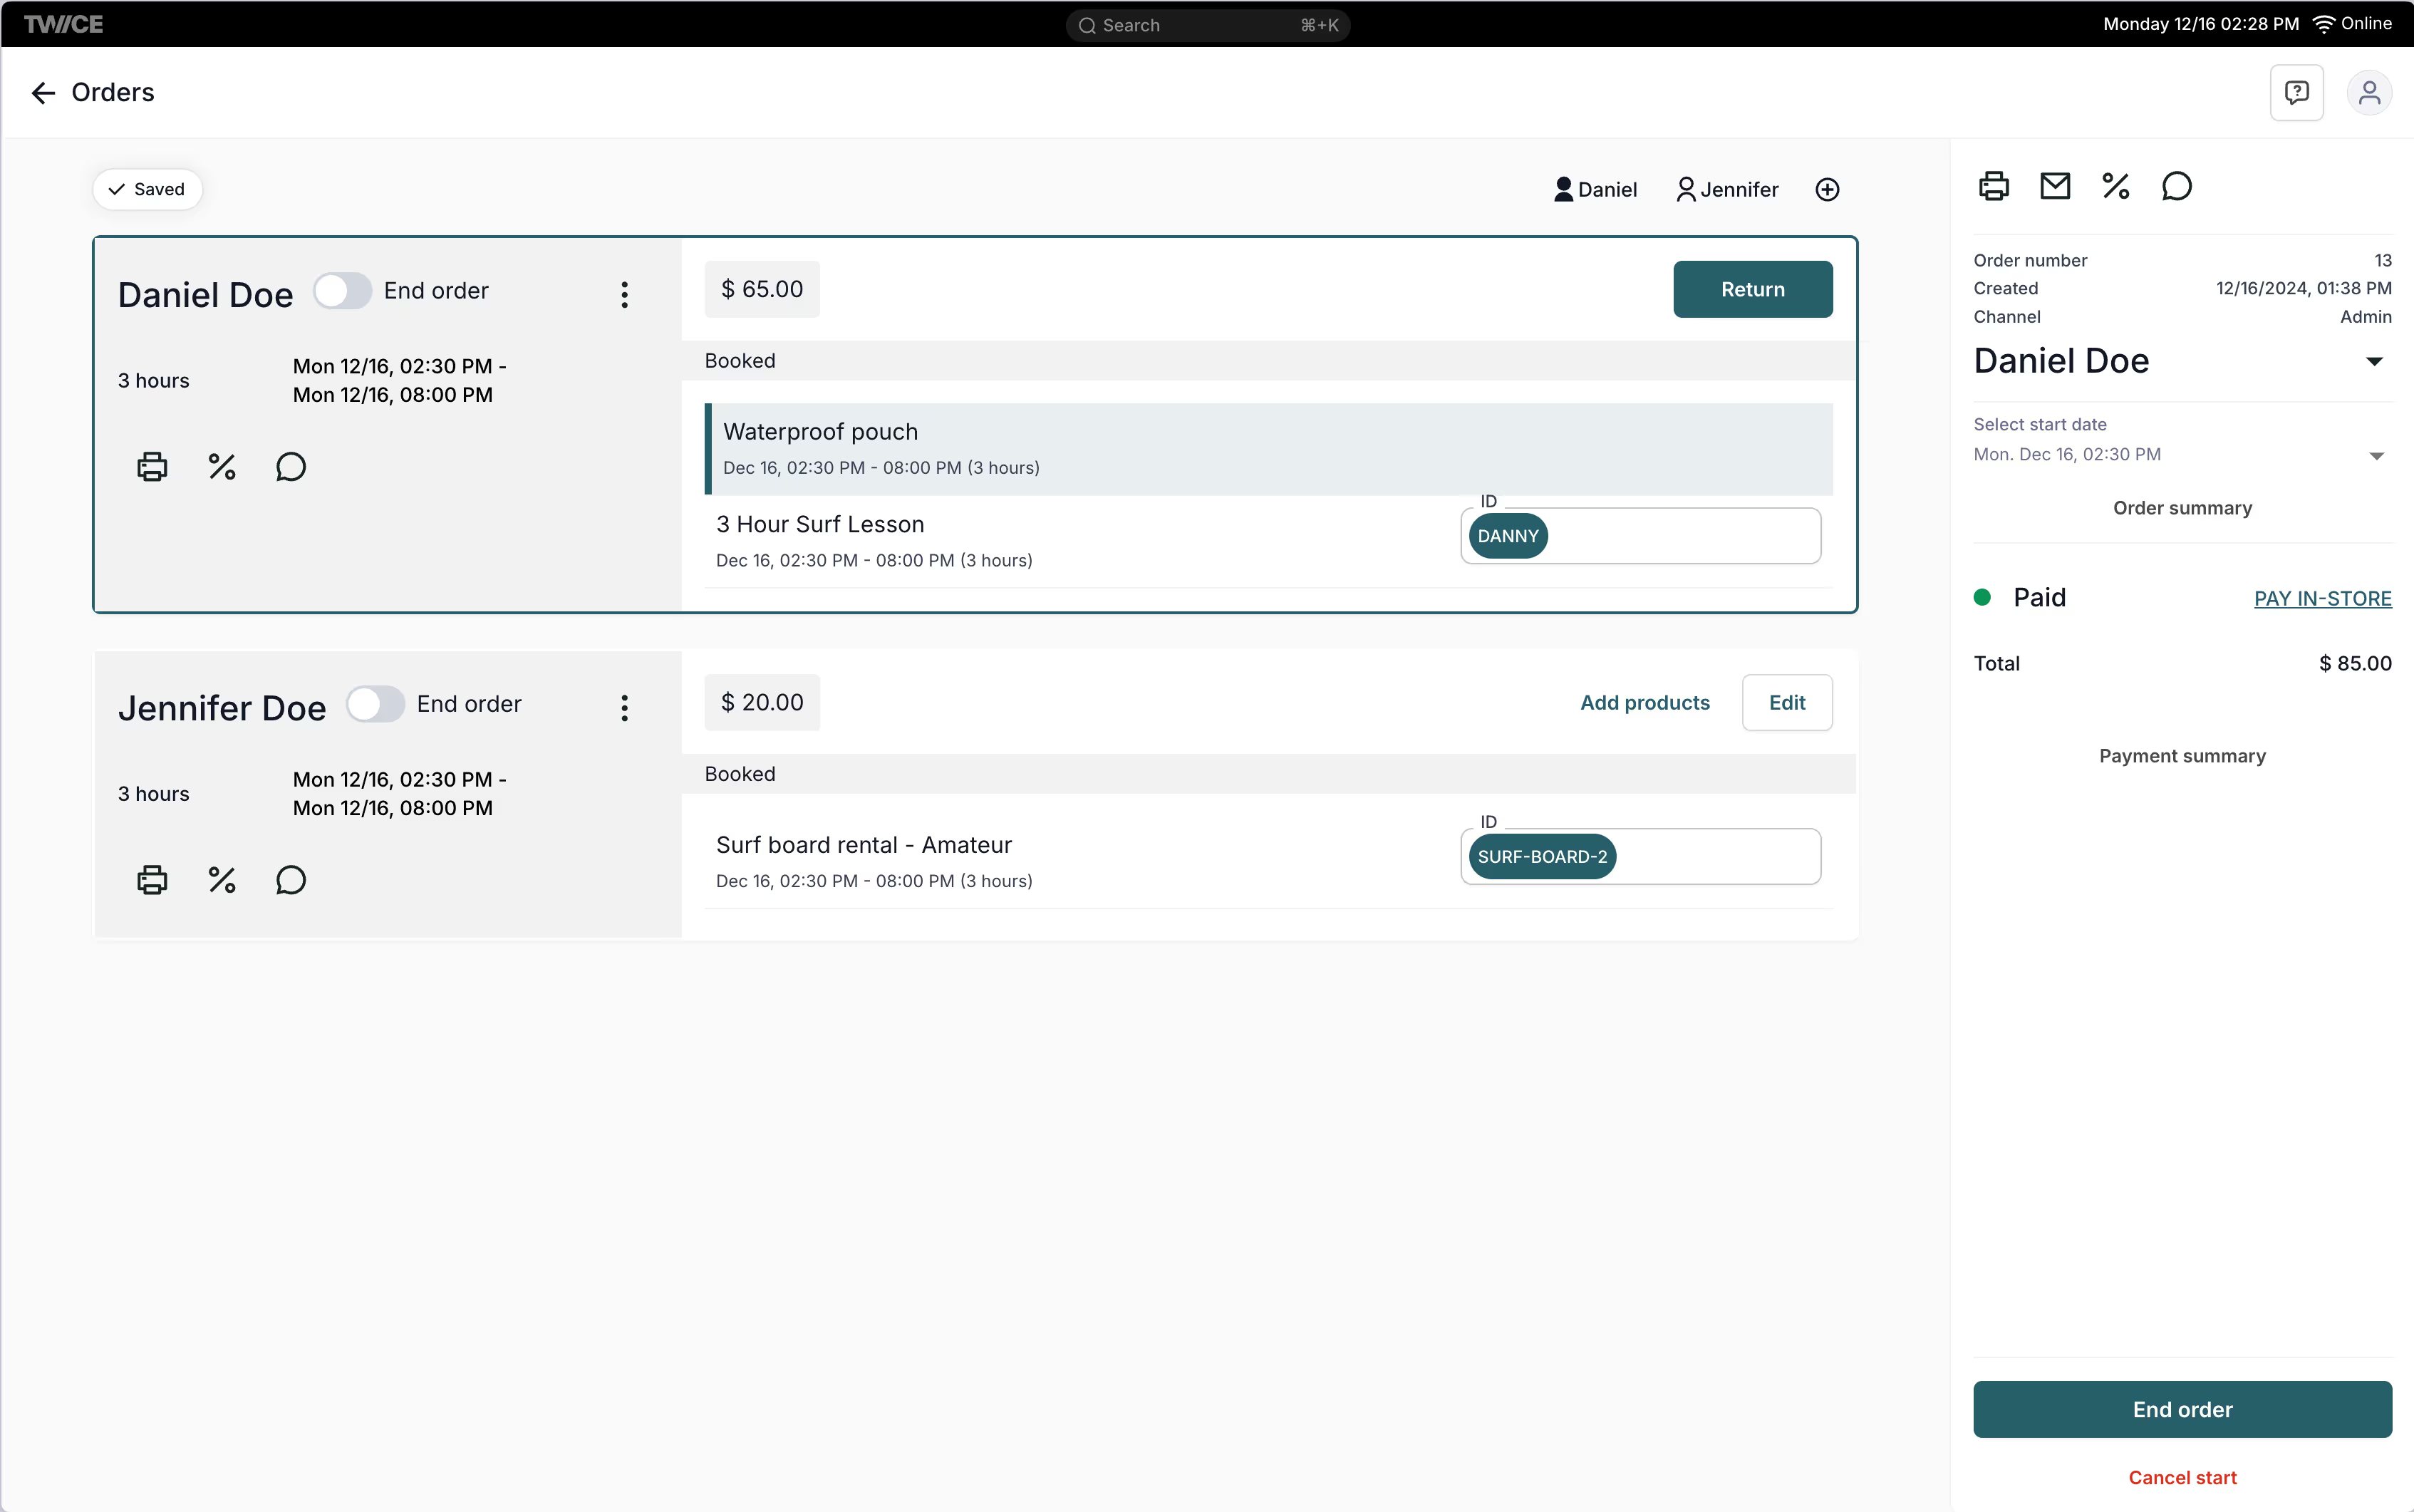
You can end the order for individual person by toggling End order next to their name.

You can end the whole order by clicking the End order on the order summary on the bottom right corner of the viewport.
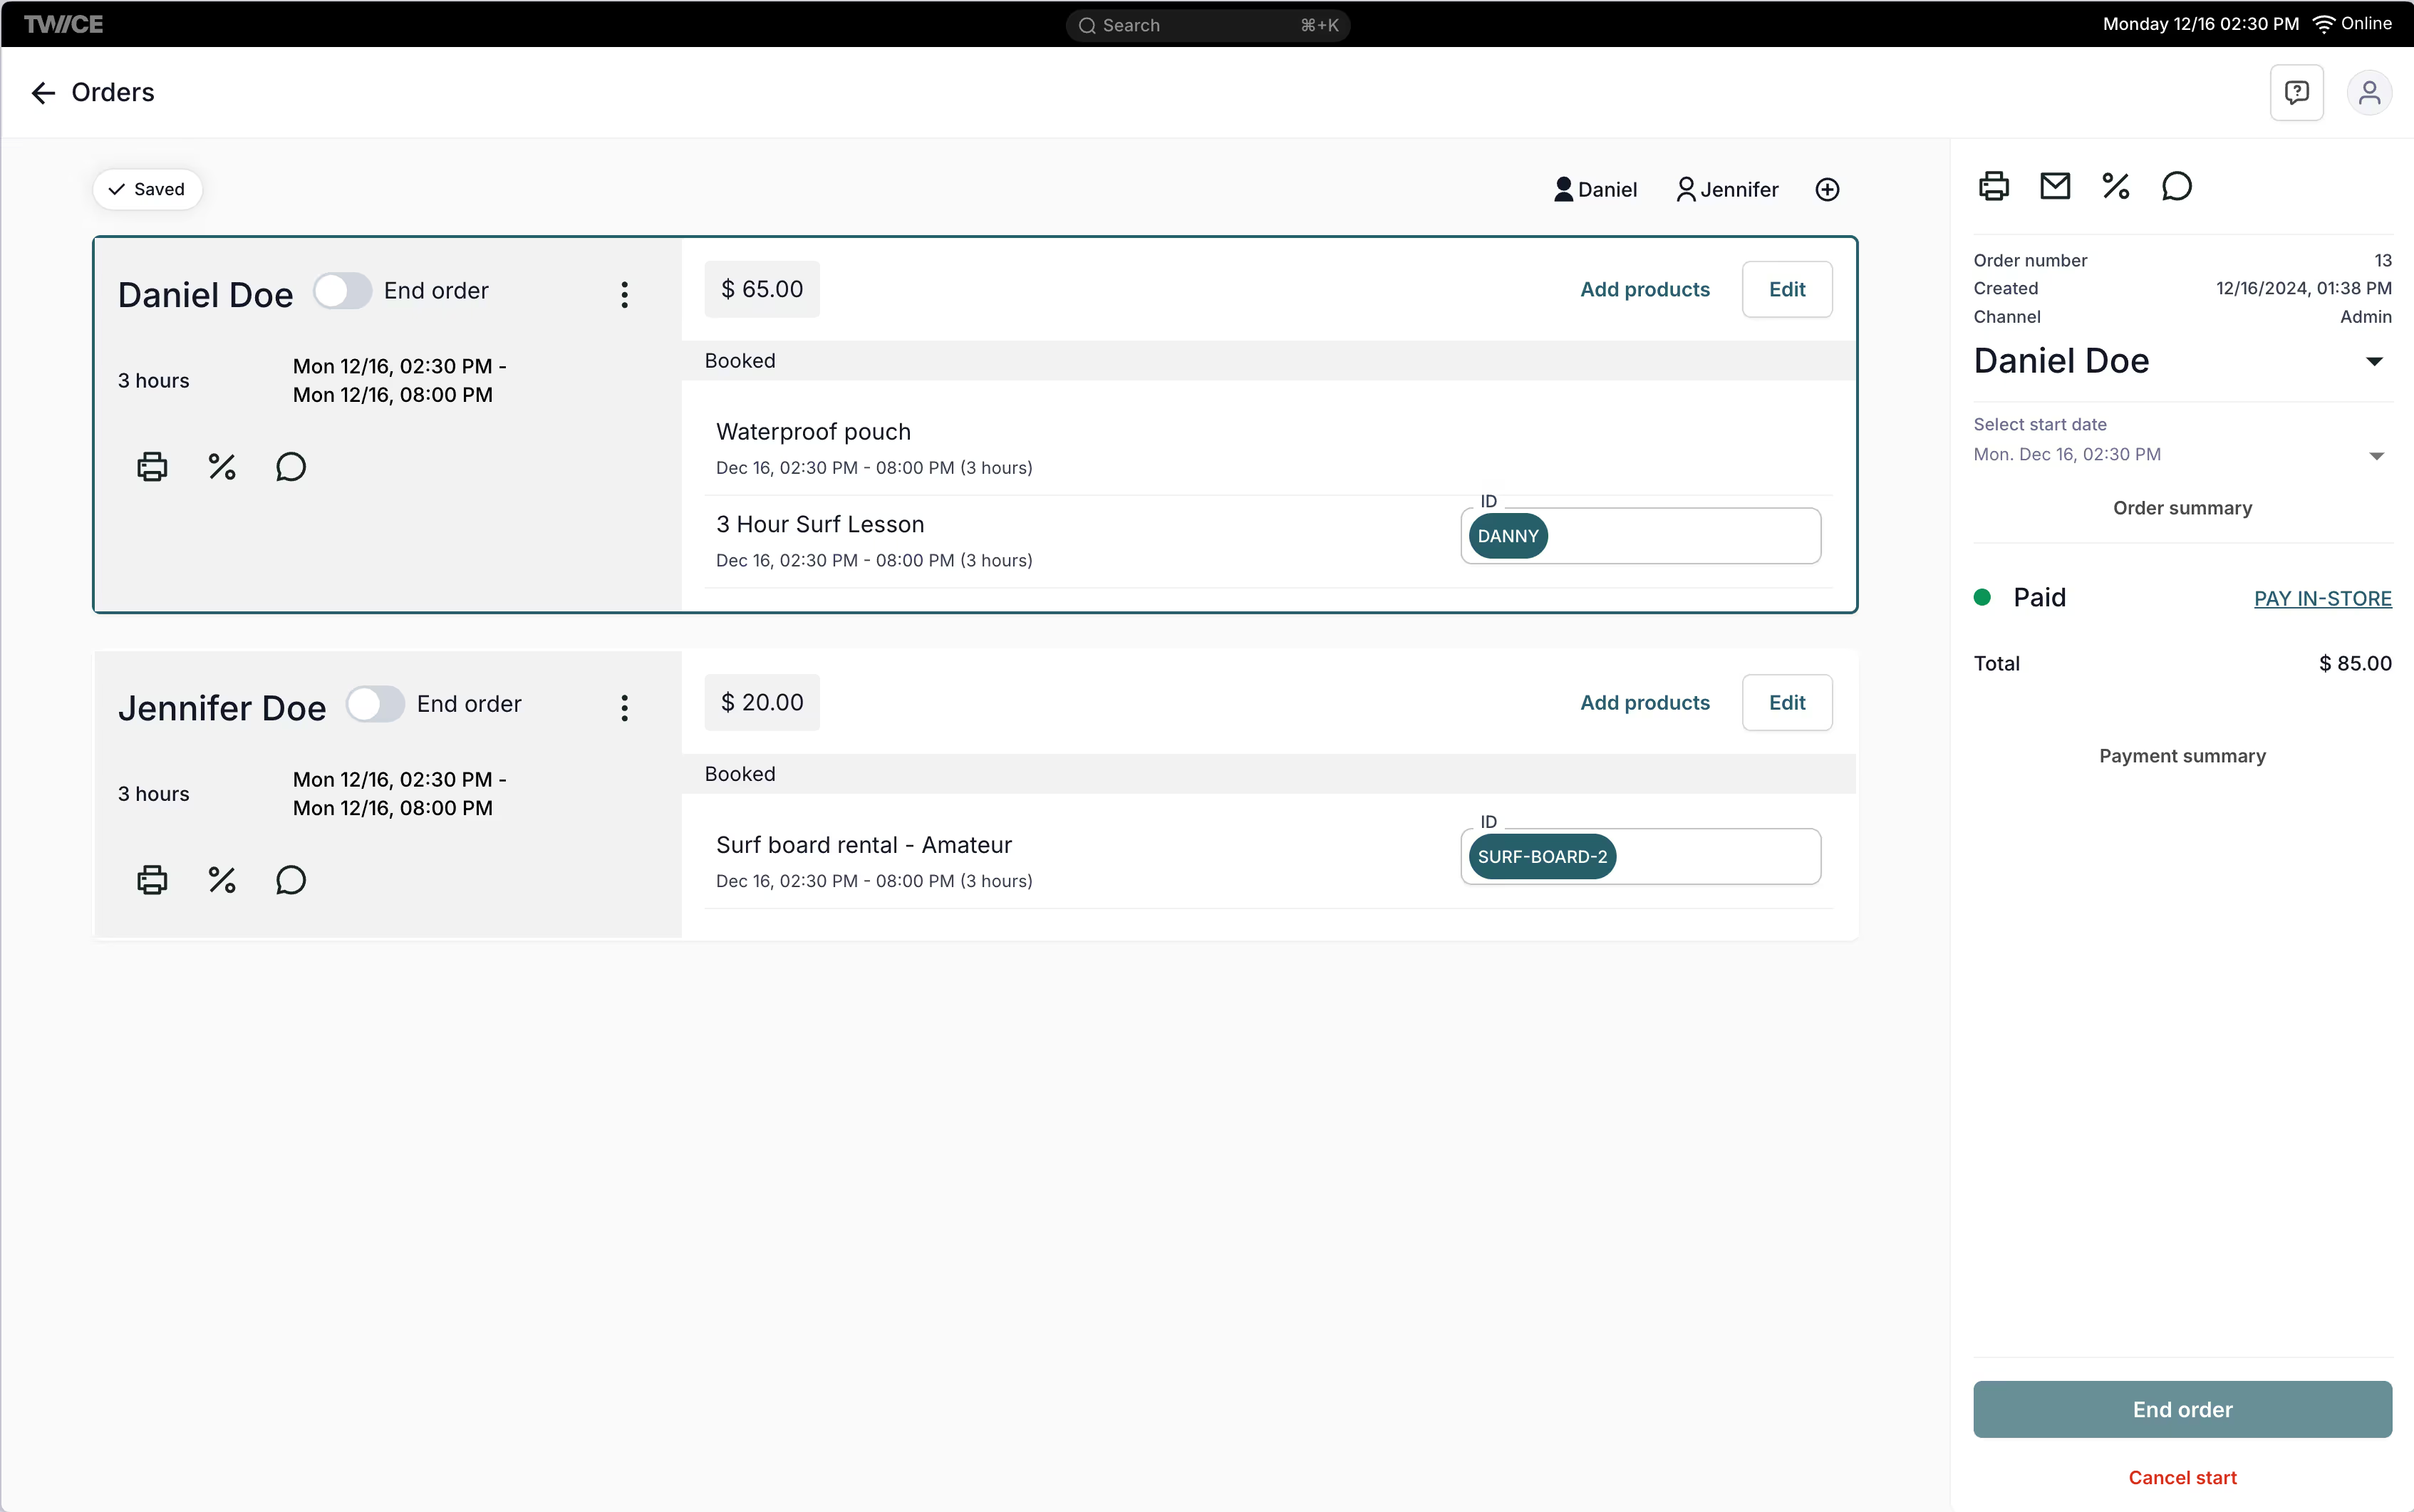
After you have ended the order, it moves to the completed view.
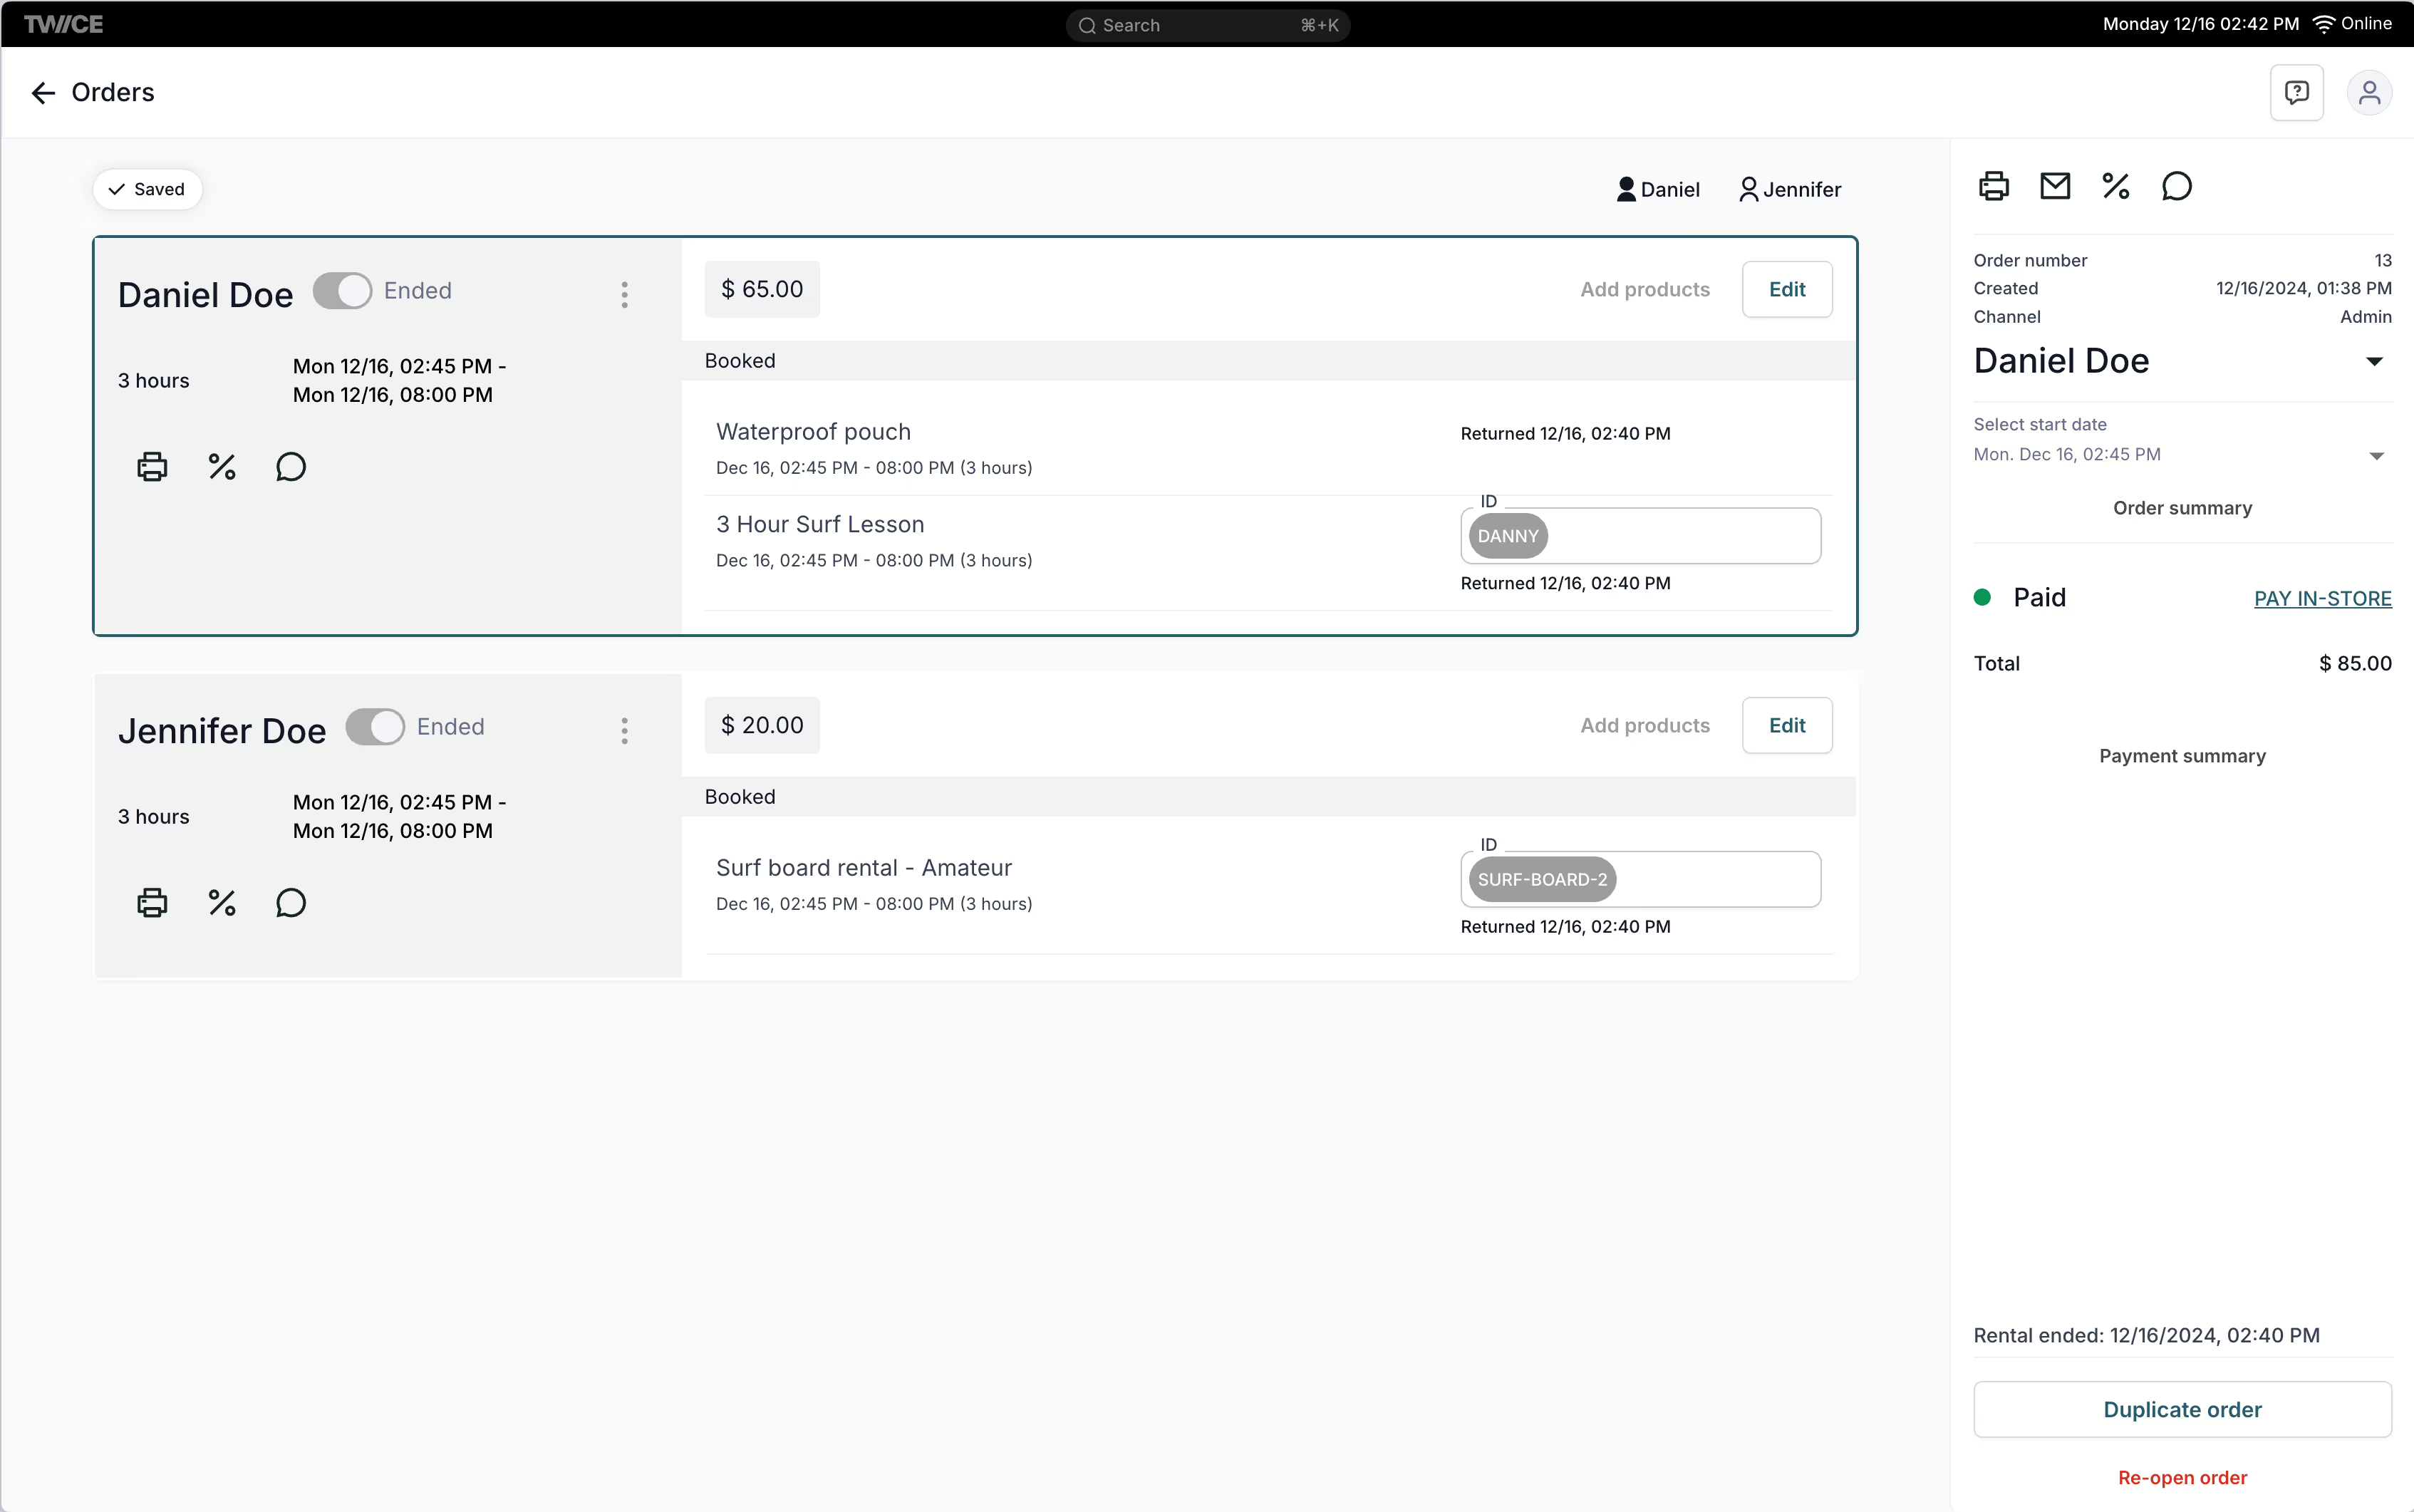
The completed section displays all past orders (including sales orders), whether they ended successfully or were canceled.
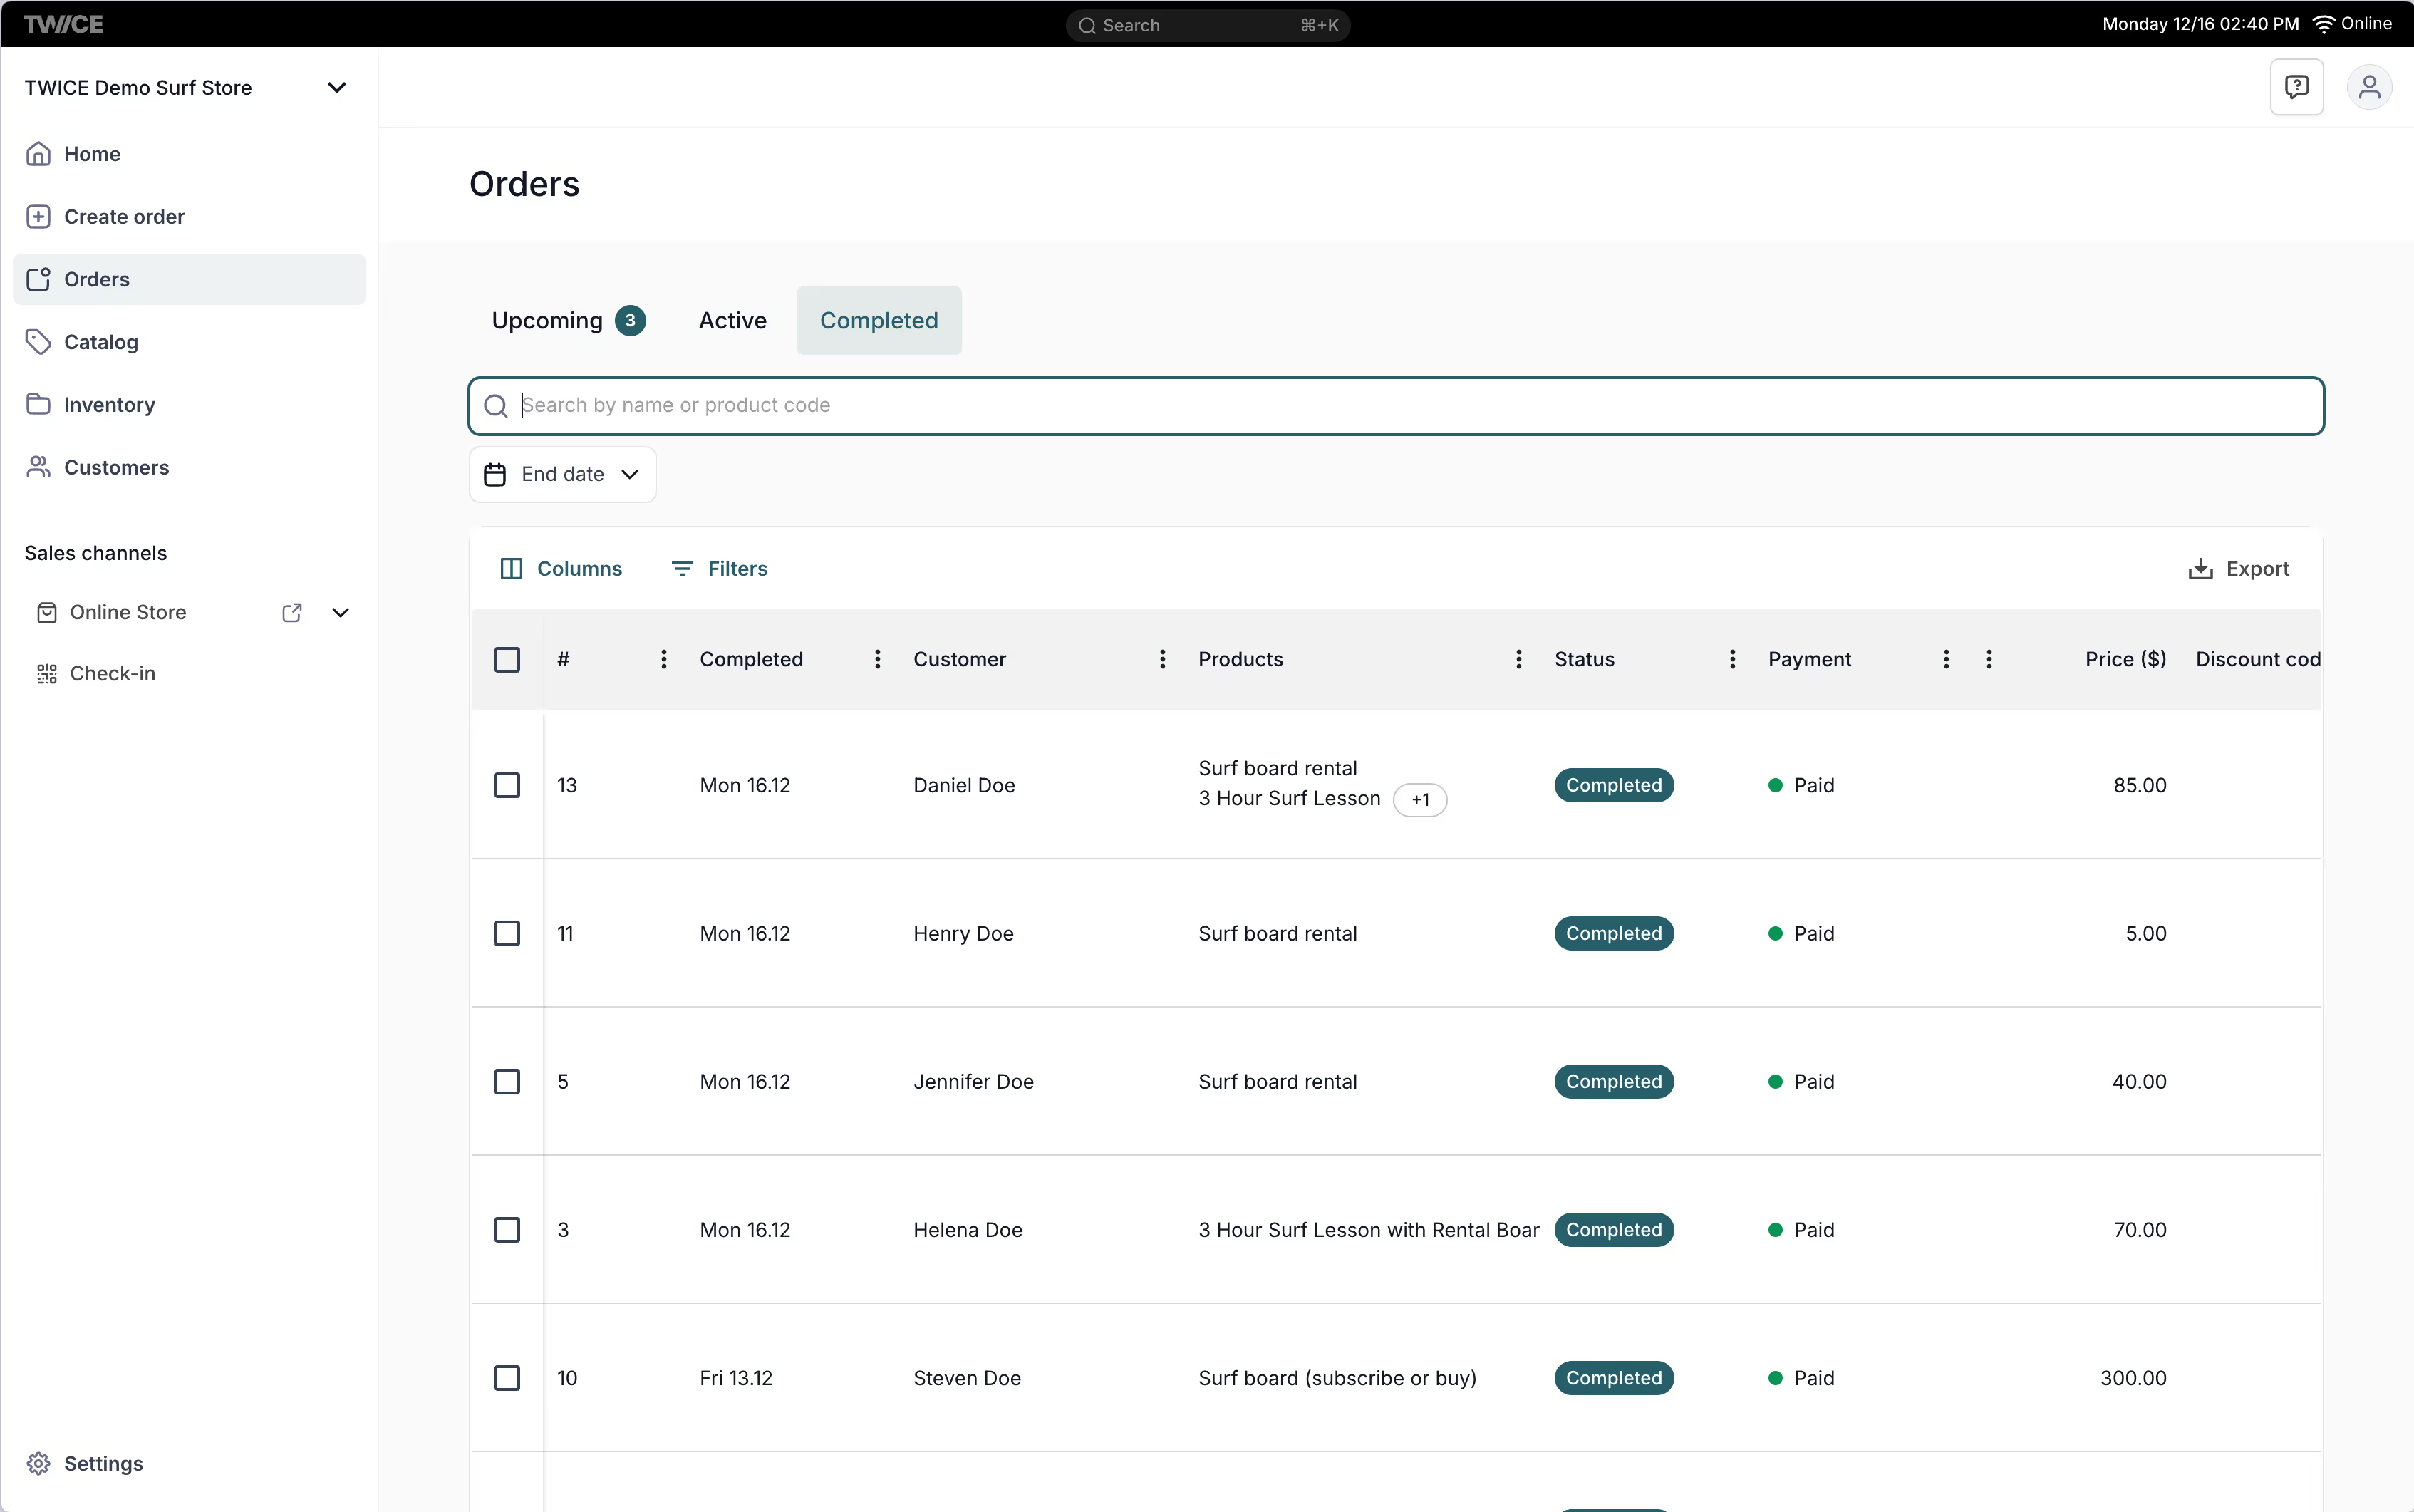
When you navigate to a completed order, you can print or send the order confirmation, write notes and modify the prices.
You can also re-open the order or create a new order by duplicating it.
All your sales orders can be viewed in the Sales orders tab. While the UI is similar to the Bookings area, sales orders have less options, as the main task is to fulfill the order.
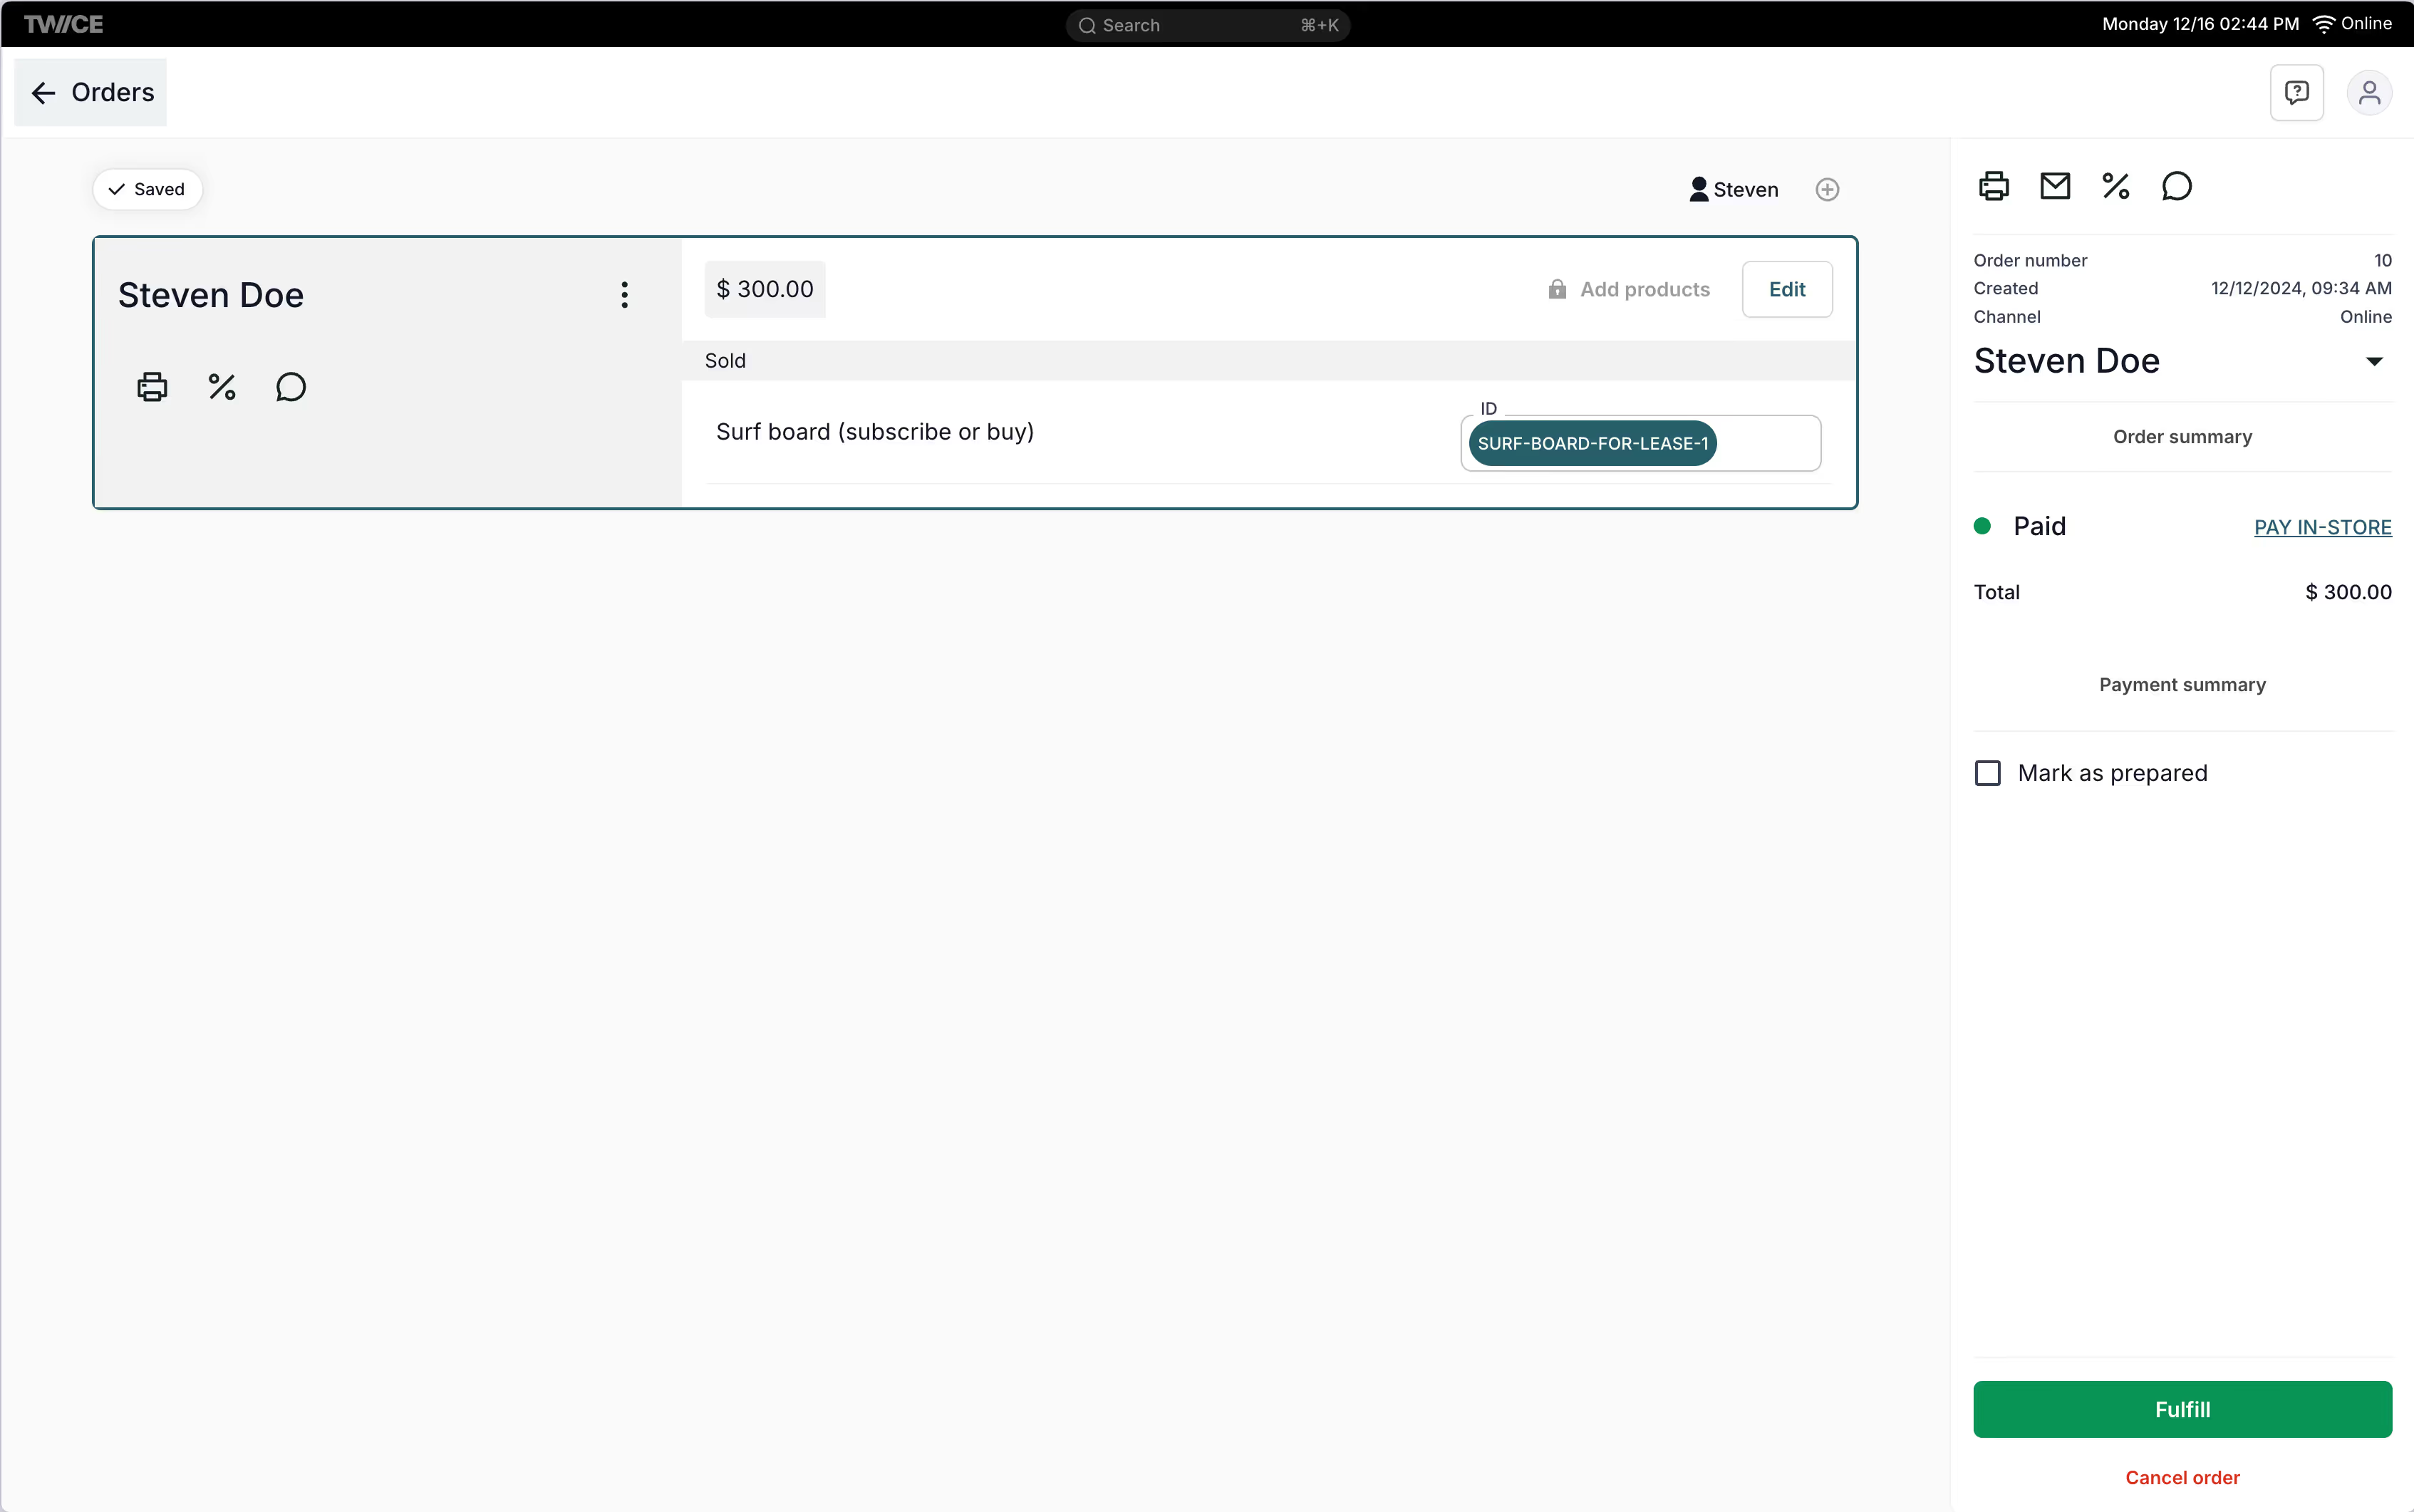
To fulfill the order, you need to specify which individual inventory item you are selling (inventory items can be marked as for sale in the inventory). The interface clearly shows which items are for sale and which are not.
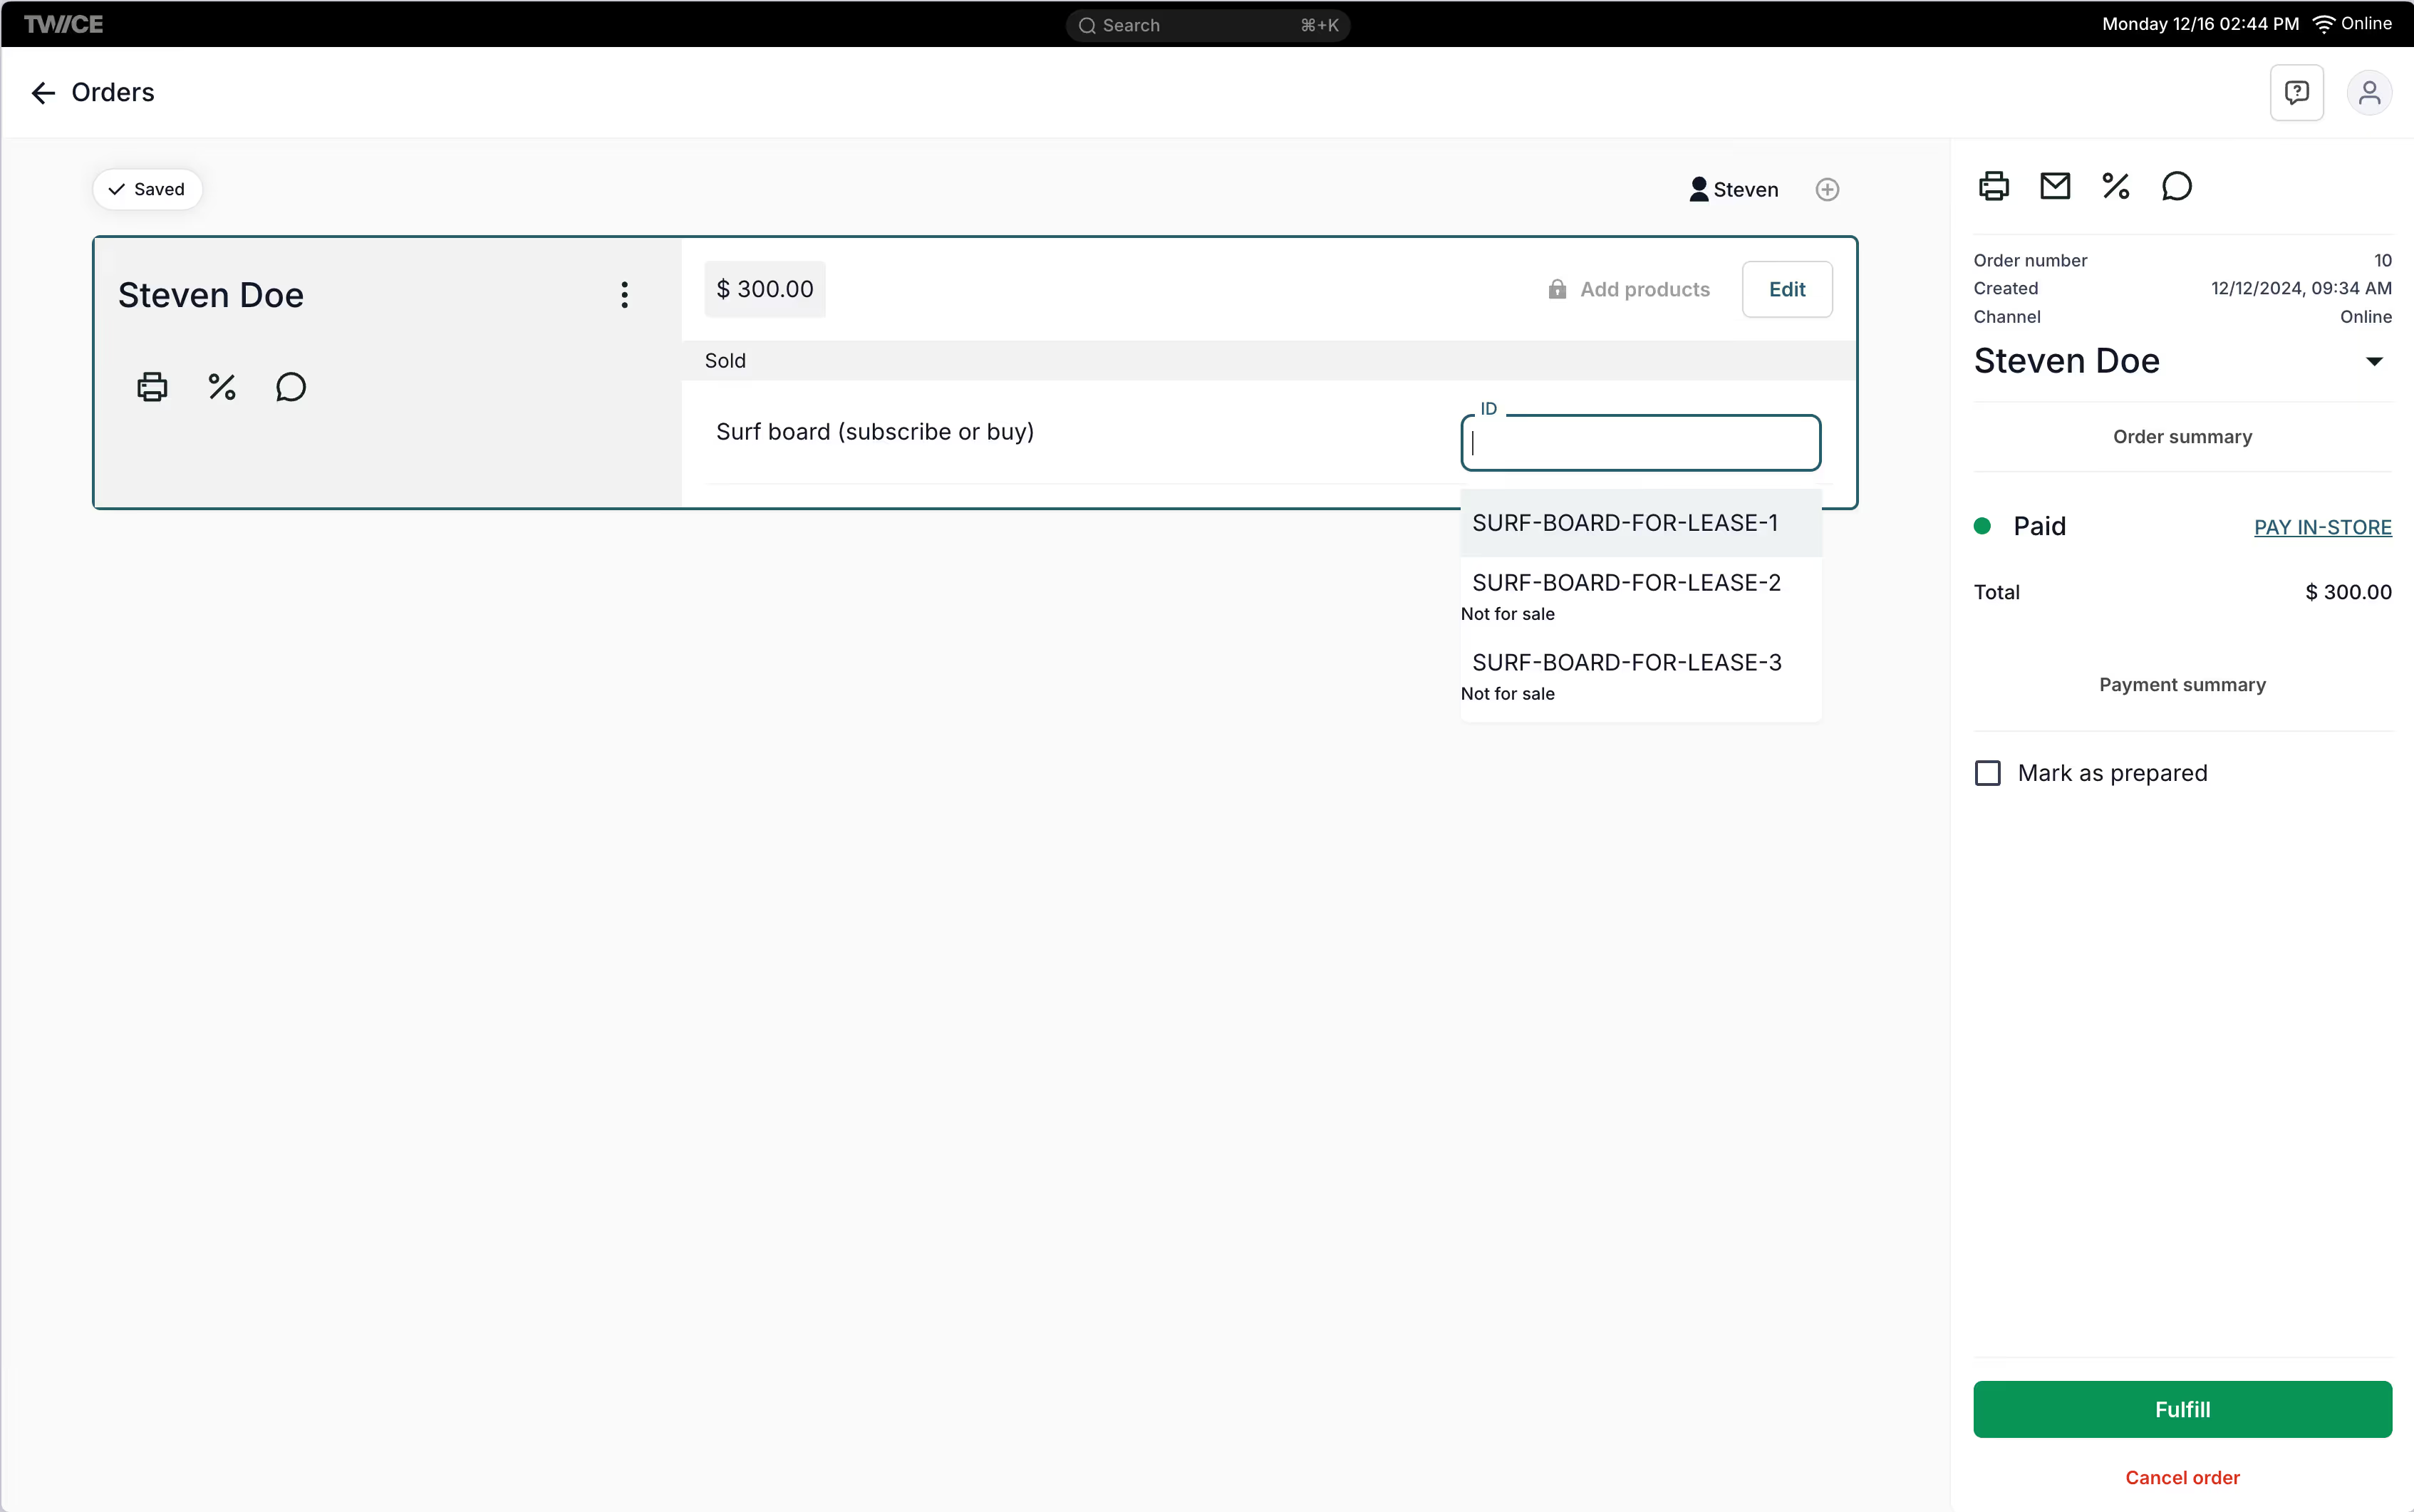
After you have assigned the item(s), you can mark it prepared and fulfilled.